Speed 400
Cloudster Project
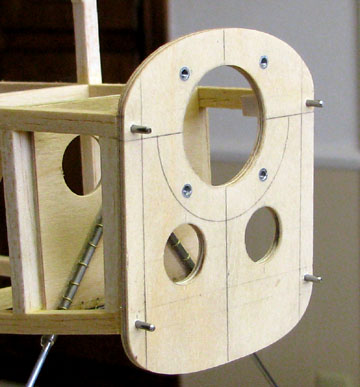
Three mistakes were made on the first
cowl frame in Report No. 50: (1) the 7/16" cowl alignment pins shown below
were too long, (2) the 3/8" aluminum tube liners for the cowl pins went into
the cowl sides too far, (3) the cowl sides were made perpendicular to the
firewall instead of parallel to the fuselage sides. Once the cowl was
blocked in and carving and trimming of the sides started, the ends of the
four embedded aluminum tube liners would quickly be exposed because they
extend out too far and are too close to outside surface of the cowl.
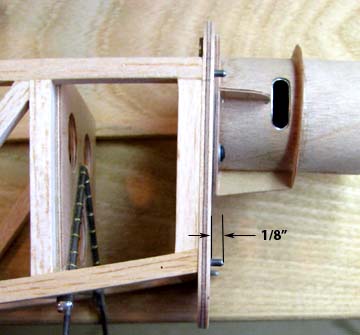
To correct this problem, first the cowl
alignment pins were shortened to 1/8" as shown below. After all, these pins
only need to be long enough to engage the back face of the cowl sides.
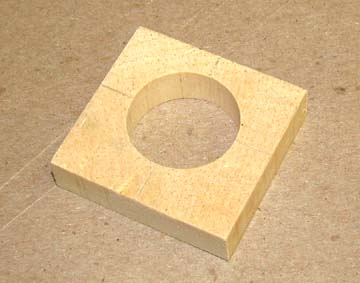
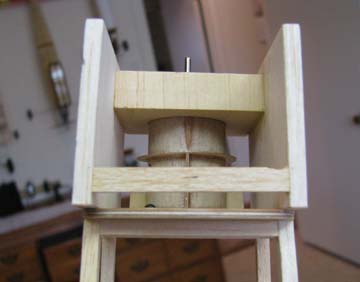
This is where the approach to the cowl
frame changes. A 1/2" length of balsa was cut off the end of a 2" X 2" soft
balsa block. The front and rear cross grain face were sanded smooth. Then a
hole was cut out in the block as shown below and sanded so as to slip snugly
over the front end of the cylindrical motor mount. Notice the end grain of
this cowl nose block.
Then two new cowl sides were made using
the procedure in Report No. 50, except the rear faces of the sides were
beveled so that the cowl sides were parallel with the fuselage sides instead
of being perpendicular to the firewall. The vertical side edges of the cowl
nose block were carefully trimmed and sanded so that the cowl sides that are
parallel with the fuselage sides were also tangent to nose block. Once this
was done, the nose block was slipped over the motor tube, the new cowl sides
were pushed onto their respective alignment pins, and the two cowl sides
were glued to the nose block with aliphatic glue as shown
below. This approach insures an almost perfect alignment fit of the cowl to
the firewall.
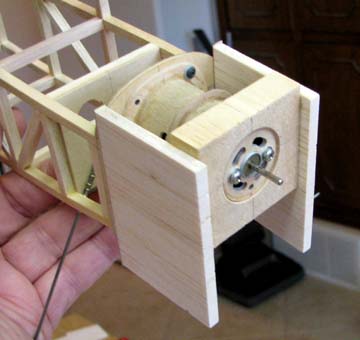
A temporary balsa brace was also added
between the cowl sides on the bottom back near the firewall to hold the cowl
side spacing until the this can be blocked in with balsa.
Once this is allowed to thoroughly dry,
then balsa will be blocked in between the
cowl sides on top and bottom. Oh yes, a method for attaching the cowl has
been thought out, but this will be presented and discussed in a later
report.....................Tandy