(This revision
includeds the method used for retaining the hinge wires.)
Speed 400
Cloudster Project
Once the stab and elevator surfaces were covered
with UltraCote Lite transparent red, the covering over the hinge slots were
cut and the hinge halves were inserted into their slots. The hinge wires
were reinserted and the hinges were completely realigned. Then the hinge
wires were removed in order to permanently bond the hinge halves in their
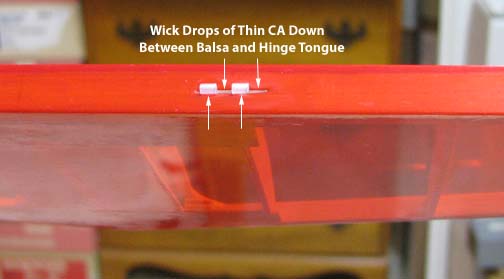
individual slots as shown below. I use thin drops of Jett CA to wick down in
between the hinge tongue and the balsa slot in several places as shown
below, which takes a pretty steady hand and lots of time. Much care has to
be taken because if the CA ever wicks into the hinge loops you are deep
trouble. For years I have blunted the tip of a straight pin with a file. A
drop of CA is applied to the blunted end of the straight pin and used to
apply the CA to the hinge. This takes a lot of practice and you waste a lot
of thin CA trying to get the drop to stay on the end straight pin, but it
can be done, given enough time and patience.
*********GREAT TIP*********
As I reported back in my Sailplane construction
series, my friend James Lollar from Ada, Oklahoma, clued me in on how to
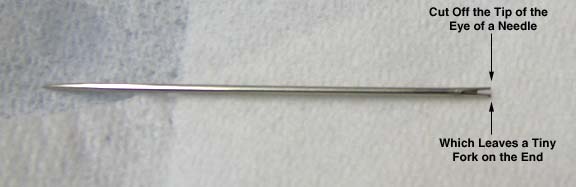
accomplish this task almost effortlessly. For years he has used a sowing
needle with the tip of the eye cut off as shown below. When he puts a drop
of thin CA on the needle, the drop will always catch and stay in the fork
due to surface tension. Then he can easily touch the fork to the desired
spots on the hinge and the CA goes right into where he wants it. I completed
bonding in all eight hinge halves on the stab and elevator in less than
twenty minutes this morning. Now why had I never thought of this simple
approach in all my years of modeling?
Thanks James for the great tip!
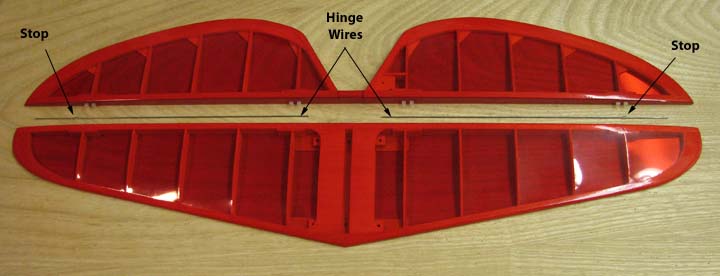
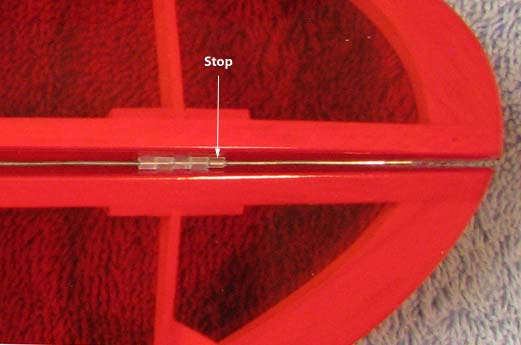
The 0.031" hinge piano wires were cut to their
final length. A loop was cut off of an extra nylon hinge, positioned on the
hinge wire, and CA's in place to serve as a stop for the hinge wire as shown
below.
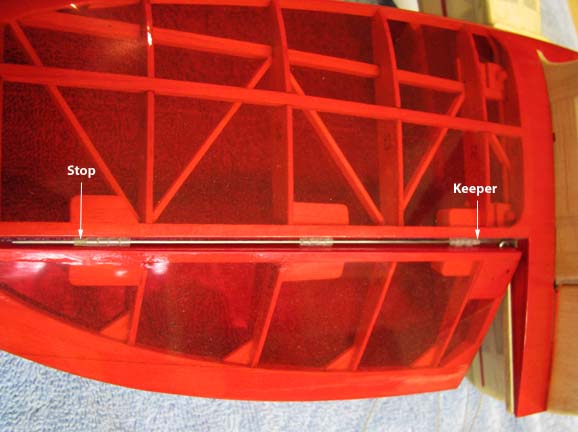
This is a picture of the right half of the
horizontal tail with the elevator deflected down so you can see the
continuous hinge wire installed.
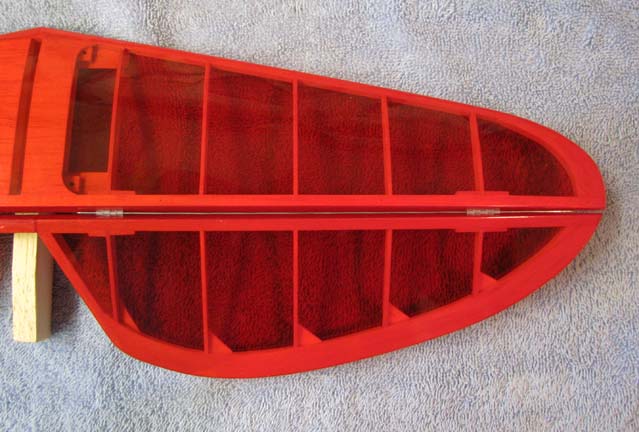
This is a close up showing the hinge wire stop up
against the outside of the hinge itself.
During final assembly, there will a "keeper" on
the other end of the hinge wire like the one shown below on the
stab/elevator combination of my Playboy Junior. The keeper is also made of
a loop on extra nylon hinge. First thin CA is wicked into the loop.
Holding the tongue of the hinge, the inside of the hinge loop is reamed
out with a No. 69 drill bit (0.0292") so that a rather snug fit is
achieved with the 0.031" hinge wire. Then the loop is cut off of the nylon
hinge.
Now here comes the tricky part. To get the
keeper onto the the end of the hinge wire, another wire with a little "L"
bent on the end is inserted part way through the keeper. Using the wire
with the L on the end, the keeper is positioned at the end of the hinge
wire, which is then pushed into the open side of the keeper. The back edge
of a No. 11 X-acto blade is placed against the edge of the keeper and the
keeper is pushed all the way onto the hinge wire. Now the stop is up
against the outside hinge and the keeper is up against the inside hinge as
shown above.
This completes the Cloudster's horizontal tail.
The next task for this afternoon will be to start covering the
wing.............Tandy