Speed 400 Cloudster Project
The .032" tail skid wire was removed from the
aluminum tube at the aft end of the fuselage. In Report No. 72, the tail
wheel landing gear was bent up out of 0.032" piano wire for an aluminum hub
3/4" tail wheel. A slight zig-zag was put into the portion of the wire that
slides up into the aluminum tube to make it fit snugly. The tail wheel wire
was coated with thin CA and pushed down into the aluminum tube, being
careful to make sure the tail wheel was straight with the center line of the
fuselage as shown below. Additional thin CA was wicked down in between the
wire and the tube using the sowing needle with the tip of the eye cut off as
the applicator.
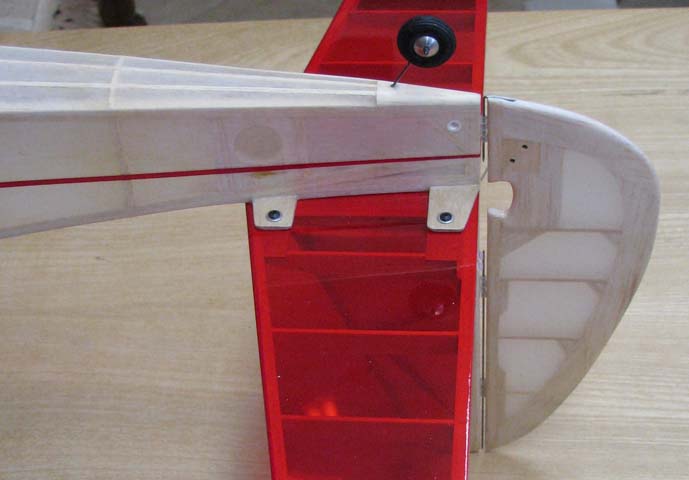
The fin and rudder hinge halves were also CA'd in
place as you can see in the picture above. The procedure for doing this
involves cutting the Polyspan/silk doped covering over the hinge slots and
inserting the hinge halves into their slots. The fin was attached to stab
and the stab was attached to the fuselage. The upper hinge wire was inserted
in the two upper hinges and lower hinge wire was inserted into the lower
hinge between the bottom of the rudder and the rear of the fuselage. The
rudder was moved back and forth several time to realign the hinge halves
with each other. Then the hinge wires were removed in order to permanently
bond the hinge halves in their individual slots with CA as shown above.
The Cloudster's "Lost" label was installed on the
top of the fuselage just behind where the wing's trailing edge will be as
shown below.
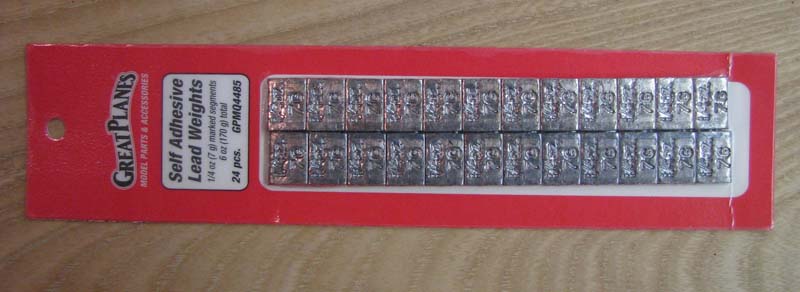
The Great Planes ballast lead weights I ordered
from Tower Hobbies arrived in today's mail. The six ounce package comes in
12 individual 1/4 oz segments shown below with self sticking tape on the
bottom. It looks like I am going to have to use three segments plus a part
of one of the segments to get the Cloudster up to 16 ounces.
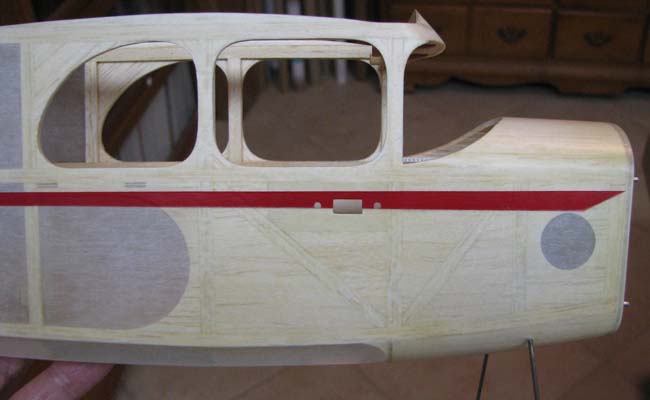
The four window openings were cut out on my
Cloudster fuselage after lunch today, which is shown below. After a careful
rim sanding, the openings are quite crisp and sharp!
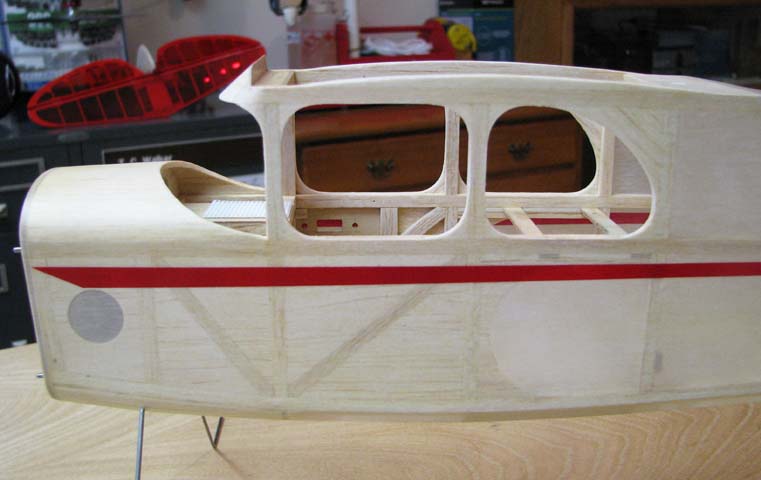
From the right side, you can see that I also cut
out the ECS switch opening and holes on the other side as well in the
picture below. However, I had to cut into the red trim strip after all,
which I was trying to avoid, but it could not be helped. Notice that I have
not cut out the fore and air ventilation holes on the sides yet.
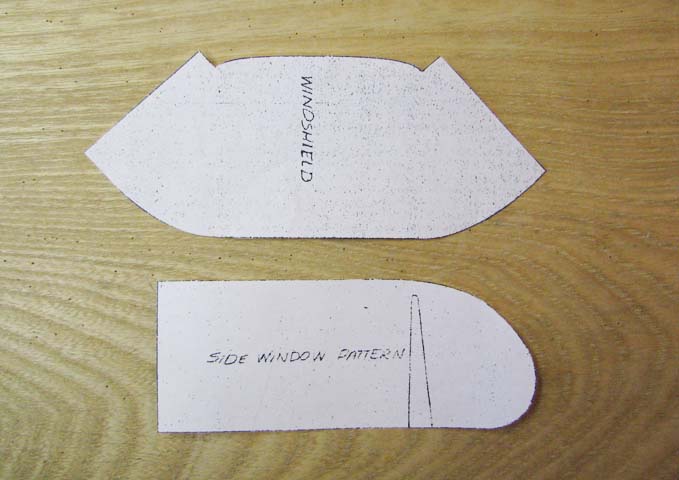
I cut the scaled down plan patterns for the
windows and the windshield as shown below. They fit pretty closely, but
some tailoring is required to get an acceptable fit to the fuselage
framework.
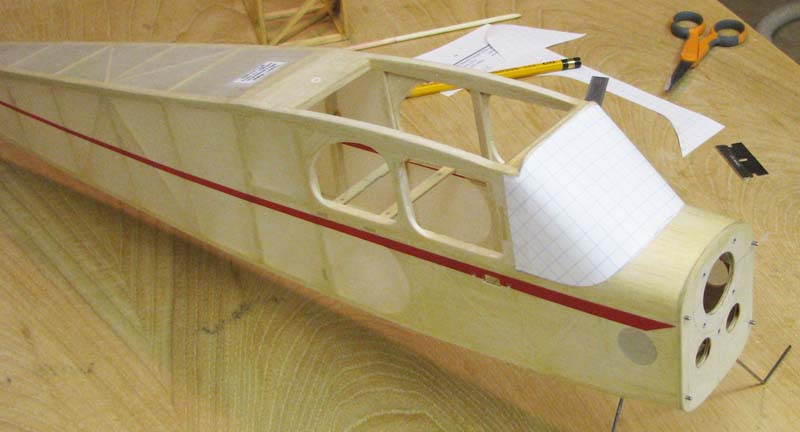
The windshield pattern was traced onto a sheet of
quadrille paper to preserve the original pattern. Then after some pattern
fitting and splicing, a very good fit was achieved as shown below.
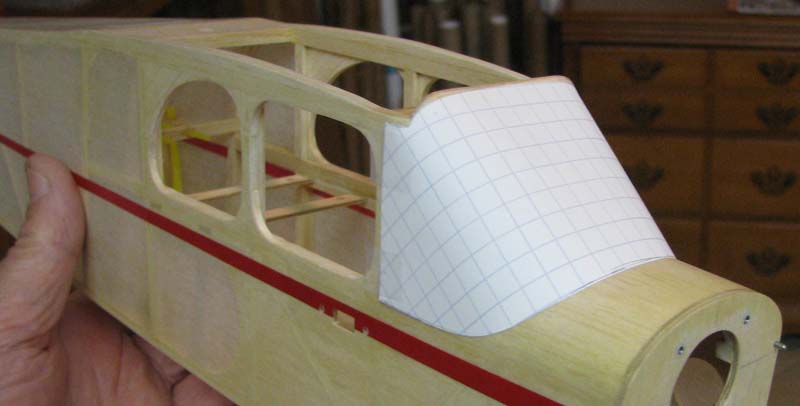
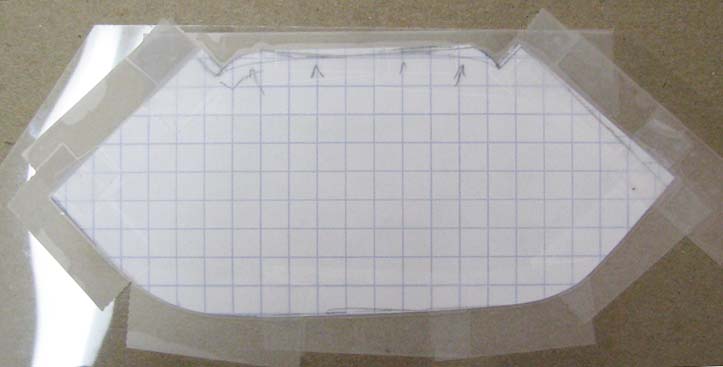
This picture shows a close up of the tailored
windshield pattern taped in place for a trial fit.
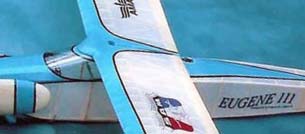
I saw the picture below of Albert Pardue's
"Eugene III" rubber model with that beautiful windshield installation.
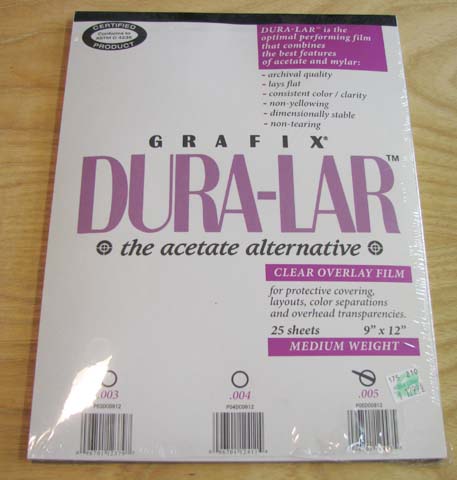
So I contacted Albert and he told me that he uses
a material called DURA-LAR by Grafix for his windshields. It is very similar
to mylar, but different. It comes in a 9" X 12" pad of 25 sheets as shown
below. It is made in three thickness'; .003", .004", and .005". You can get
it at your local Hobby Lobby Arts and Craft store and it cost $12.99 a pad,
which is really only a little over fifty cents a sheet. As you can see, I
bought the .005" thickness.
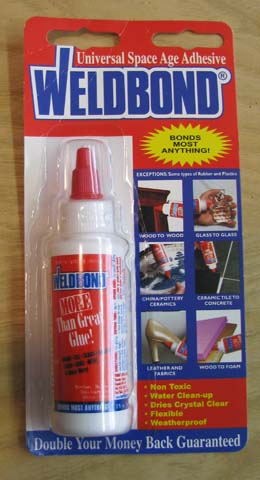
Albert uses Weldbond glue to install his
windshields with. He said to try either Lowes or Home Depot, but neither one
had the Weldbond glue. I finally found mine at one of our large privately
owned hardware store here in Arlington for $2.99 a bottle.
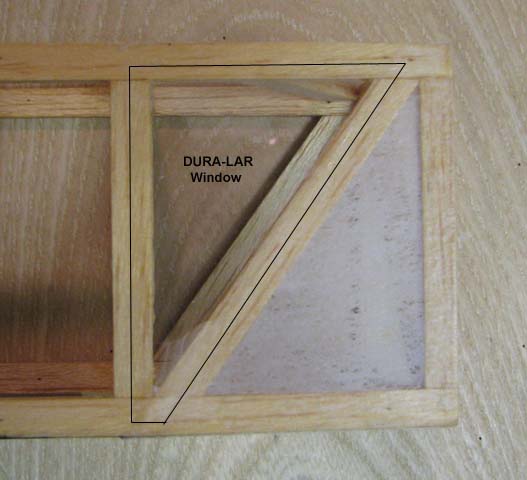
Never having used either one of these products, I
made a window mock-up this afternoon to use as a test case for bonding
DURA-LAR on with the new Weldbond glue as Albert recommended. As you can
see in the picture below, the Weldbond glue dried completely clear and
really has the DURA-LAR stuck down tight. I outlined the piece of DURA-LAR
so you could see where it stops, otherwise, you couldn't tell.
I think these products are going to work well for
me. Thank you Albert for sharing products with me. This evening, before I
quit working, I taped the tailored windshield pattern down on a sheet of the
DURA-LAR as shown below.
Tomorrow, I plan to cut out the DURA-LAR and
tackle the installation of the windshield......................Tandy