Speed 400
Cloudster Project
This morning,
the perimeter of the disk was trimmed down and sanded to shape for a snug
fit inside the front of the motor tube as shown below.
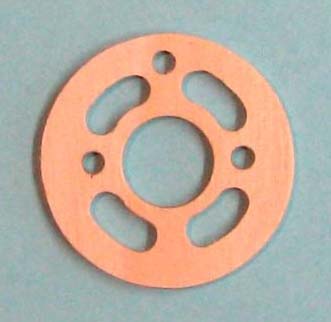
The finished disk was oriented so that the single hole lined up with the
bottom seam in the motor tube as shown below and then slipped inside the
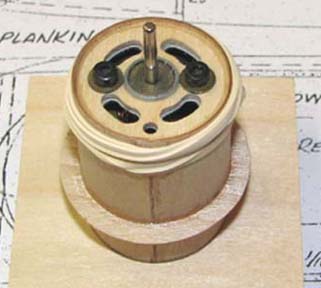
front of the motor tube. The Speed 400 motor was inserted from the rear and
pushed forward to contact the inside face of the disk. The motor was then
rotated to align its openings with the openings in the disk and the two 2.6
mm mounting screws were screwed in. By pushing on the back of the motor,
the disk was moved forward to within about a 1/16" from the front edge
of the motor tube. At this point the disk was CA'd around its circumference.
A rubber band was wound around the outside of the front edge of the motor
tube to insure a good bond between the disk and motor tube as shown below.
Once dry, the rubber band and motor were removed from the tube in order to
take this picture for you to see.
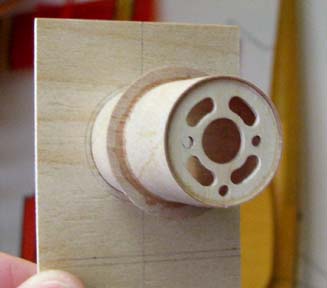
The rolled motor tube with the disk glued in the front makes this motor
mount incredibly strong and it only weighs 2 grams as shown below. However,
the 1/16" plywood back plate and four small gussets will probably add
another 1 to 2 grams. But what the heck, I think a 4 gram motor mount
represents a significant weight savings, even if it was time consuming to
make.

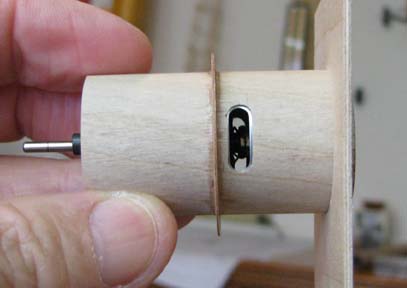
Again, working in the blind, an iterative process of cut and fit was used to
make the motor's brush ventilation slots on the side of the motor tube as
shown below.
The motor mount with the Speed motor inside was placed on the Cloudster plan
for a trial fit as shown below. The current unknown is how much length is
going to be required to fit the 1-3/16" spinner/adapter on the motor's shaft
so the rear face of the prop is in the proper place on the plan. If you look
close at my notation below the motor tube, you will see there is a fair
amount of adjustable length to accomplish this.

So at this point I have to stop work on the motor mount until I receive the
1-3/16" spinner/adapter from Hobby Lobby in about two weeks. Then I can trim
up and finish the motor mount's 1/16" plywood back plate and glue it in
place. This back plate is what will bolt to firewall. I plan to add four
small gussets in a cruciform configuration between the motor tube and the
back plate for additional motor tube support. So I guess I will turn my
efforts now to building on the stab and rudder.
Speaking of Hobby Lobby, I contacted Jay
Burkhart (a electric modeler and Hobby Lobby technical
consultant) this morning to assist me in getting yesterday's
order corrected for the right LiPo battery packs. I received the updated
corrected confirmation from Hobby Lobby this afternoon.
Item Description: PL2 1350mAh 2S 7.4V
Item Number: TP13502SPL2
Quantity Ordered: 2
Item Number: TP13502SPL2
Quantity Ordered: 2
Thank you for your help and support in this matter
Jay!.............................Tandy