J-3 Cub Thrust
Alignment Aluminum Insert
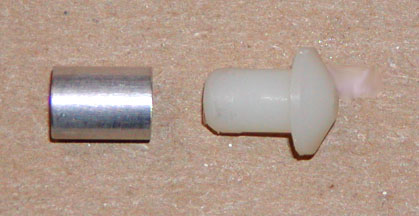
I just wasn't happy with the way the flange on the plastic prop bearing rested against the nose block because it only made contact at one place in the lower corner due to skewed thrust axis. To correct this situation, I cut off a piece of K&S 9/32" light aluminum tubing the length of the shank on the plastic prop bearing as shown below.
Then I modified the nose block jig to account for
the 1/8" thick key, which was now glued on the back face of the nose block,
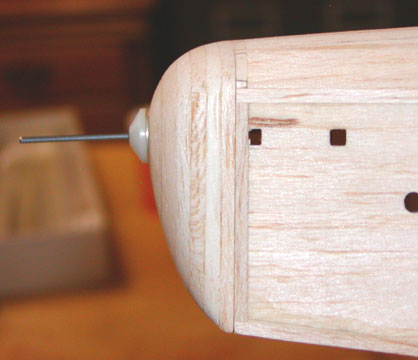
and redrilled the nose block hole with a 9/32" bit on the drill press. The
picture below shows the aluminum insert partially pushed into the nose block
and the shank of the plastic prop bearing partially inserted into the
aluminum insert.
To insure accurate alignment of the short
aluminum insert with the nose block hole axis, I inserted the remaining
9/32" aluminum tube about half way into the rear of the nose block and
coated the inside of the front nose block hole with epoxy. The short
aluminum insert was slipped onto a 1/4" brass tube and the brass tube was
then inserted through front nose block hole and into the rear aluminum tube.
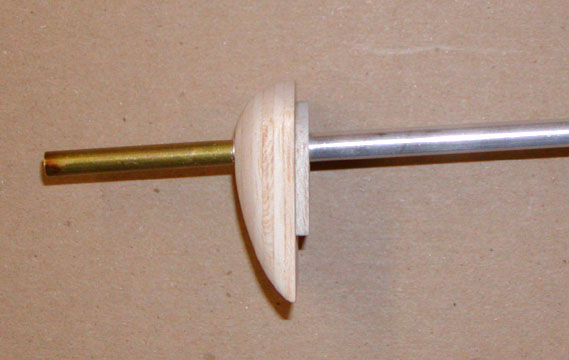
Then the brass tube was pushed all the down to the face of the nose block,
which took the short aluminum insert into the hole also. This was tight fit.
In this manner, the short aluminum insert is correctly aligned with the axis
of the nose block hole as shown below. The 4 degrees of down thrust can be
seen in this picture also.
The aluminum tube was then removed from the back
of the nose block bring the brass tube out with it also. The epoxy was wiped
off the front of the nose block with alcohol and the short aluminum insert
now in the nose block was swabbed out with alcohol on a Q-tip to remove any
epoxy that got inside the short aluminum insert. The front face of the short
aluminum insert provides a surface that is perpendicular the thrust axis as
shown below
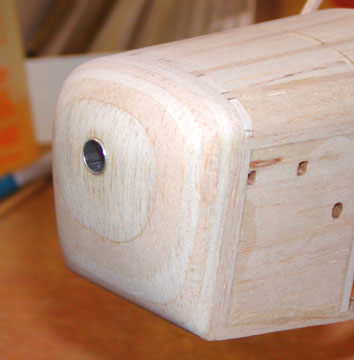
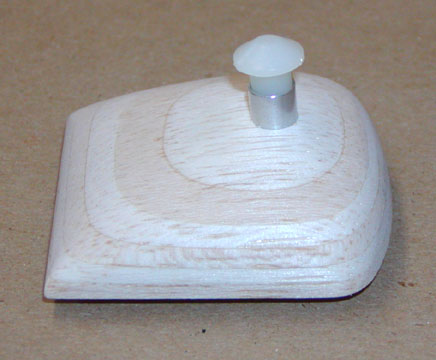
This last picture shows the flange of the plastic
prop bearing firmly seated against the front face of the short aluminum
insert. Note the prop shaft in the picture.....................Tandy