78 J-3 Cub Clay
Ballast Weight, Rubber Motor,, and New Blast Tube
This morning, my friend Jerry Burk and I took the
J-3 Cub and drove over to Mike Midkiff's place in Hurst, Texas. Mike made up
one rubber motor to be used for test flying. It consisted of 8 strands of
1/8" TAN 2 "Sport" rubber, I think he called it. He showed me how to tie the
knot in the rubber and then he carefully lubricated each strand of the motor
with a rubber lubricant called "Dowel Corning 33". He fitted the front of
the motor with "Crockett hook". He hooked the rubber motor to the prop shaft
on my J-3 Cub's nose block. Then he hook up the rubber motor on his bench,
stretched it out, and put in 150 turns with his 10-to 1 winder and let the
prop go. After a couple of runs, Mike decided he was happy with length and
number of strands for test flying purposes. We then installed the rubber
motor in the fuselage and checked the balance point, which naturally turned
out too far forward. We added green clay to the back of the nose block as
shown below to set the balance the model for flight testing.
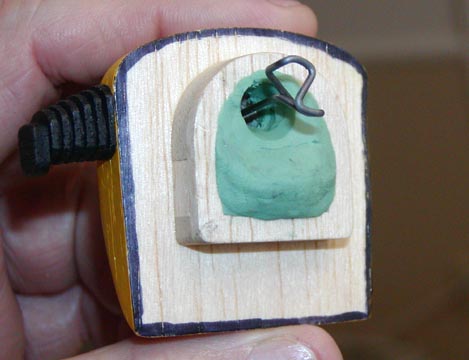
This shows the 8 strands of 1/8" TAN 2 "Sport"
rubber motor hooked to the back of the prop shaft with Crockett hook.
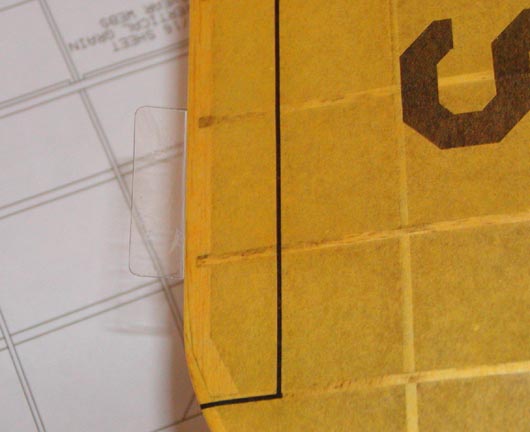
Mike checked out the wing and stab for warps and
discovered the right wing had a slight wash-in (TE down) out near the tip.
So he made the clear plastic tab bent slightly up to provide compensating
wash-out (TE up). When I got back home, I glued this clear plastic tab on to
the bottom of the wing's TE with Formula 560 canopy glue as shown below.
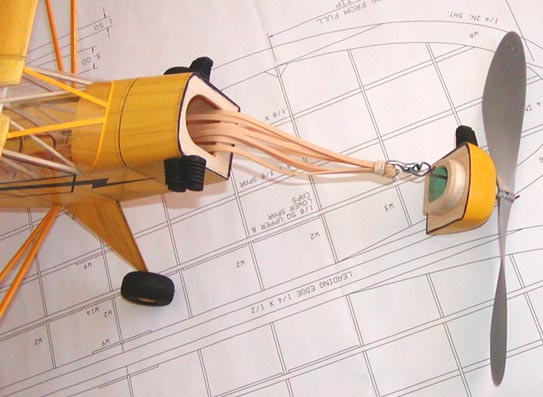
We used Mike's Stuffer stick to install the
rubber motor in the fuselage of the J-3 Cub. We used Mikes wire to insert my
blast tube, which was really larger in diameter than necessary and I had a
little trouble engaging the end of the blast tube on the motor pin. Using
Mike's 10-to-1 rubber motor winder, we stretched out the rubber
motor and put in 150 turns. Then Mike had me go through the drill of
removing the blast tube and hooking the Crockett hook the back of the prop
shaft. Then we let the prop go and unwind. We actually went through this
drill twice so I could get a good feel on how to handle the rubber motor.
Being very tactful, Mike suggested that maybe I would want to make another
smaller blast tube with a little different end to make engaging the end of
the blast tube on the motor pin a little more tractable. So on the way home
after Jerry and I stopped for lunch, we went by the hardware store and
bought a two-foot length of the smaller thin wall PVC pipe to make a new
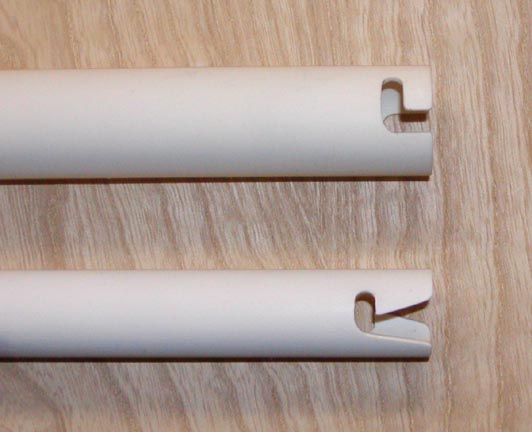
blast tube. This evening, I cut the tube to length and drilled, cut, and
sanded the new end on the smaller diameter blast tube shown at the bottom of
the picture below. Notice the smaller diameter as compared to my first blast
tube shown on top and "V" lead-in to facilitate engaging the motor pin.
The J-3 Cub is now ready to start its series of
test flights a little later on when it gets warmer and the weather gets
nicer. I can hardly wait to send a picture of the J-3 Cub in
flight.........................Tandy