80 J-3 Cub Post
Flight Activities
As a result of all of the adjustments Mike made
during flight testing of the Cub on Thursday, I spent the afternoon
yesterday incorporating them permanently. The first thing I did was to made
a single nose block shim equivalent to the combination of down and right
thrust pieces you had glued in between the nose block and front bulkhead.
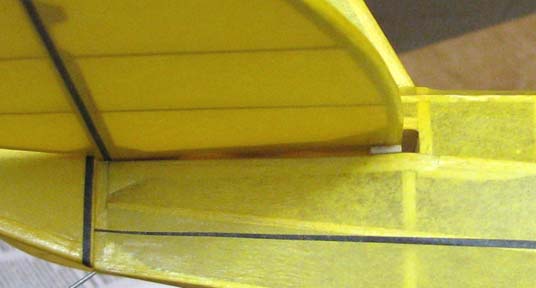
I set up a position jig and sanded a sheet of 1/8" balsa such that the
resulting shim had 1/8" thickness on the upper right corner and was near
zero thickness on the left edge as seen in the picture below.
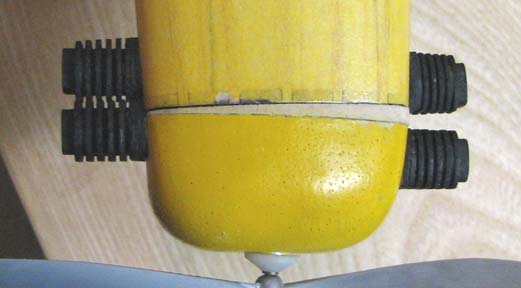
In addition, the shim had 1/16" thickness on the
lower right corner and was near zero thickness on the left edge as seen in
the picture below. This reproduced the combination of right and down thrust
you came up with.

The trick was to get this shim glued onto the
back of the nose block. To do this, I looped red rubber bands around the
prop shaft as shown below.
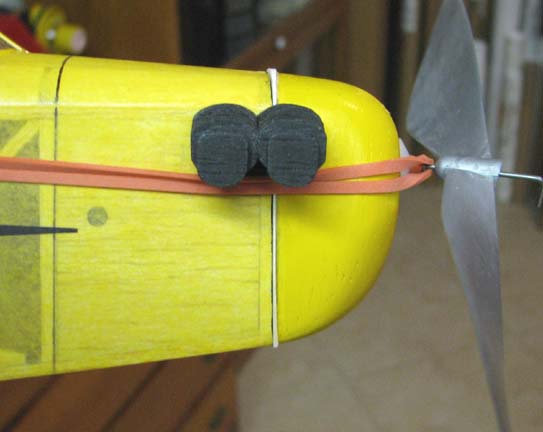
Then I inserted a short piece of 5/32" piano wire
through the aluminum motor peg tube at the rear and pulled the red rubber
bands back and looped them over the ends of the piano wire as shown below.
The rubber bands were pretty tight and compressed the glue surface of the
shim against the nose block using the front bulkhead as the press.
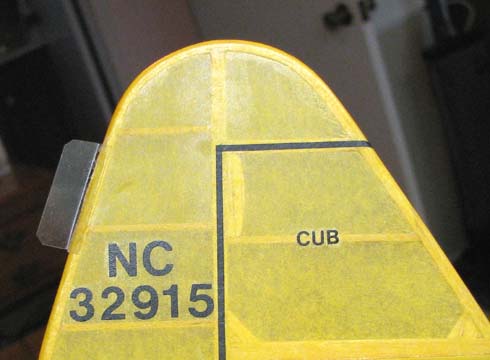
Next I carefully removed the temporary rudder tab
from the trailing edge of the rudder. I made a new one of the same size and
deflection and CA'd it to the rudder as shown below just to clean up the
tabs cosmetic appearance and make it less visible.
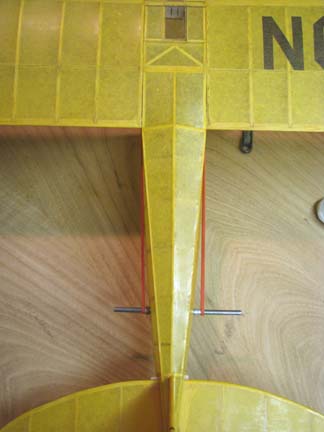
I cut a 1/16" balsa shim and CA'd it in place
over the stabs main spar as shown below.
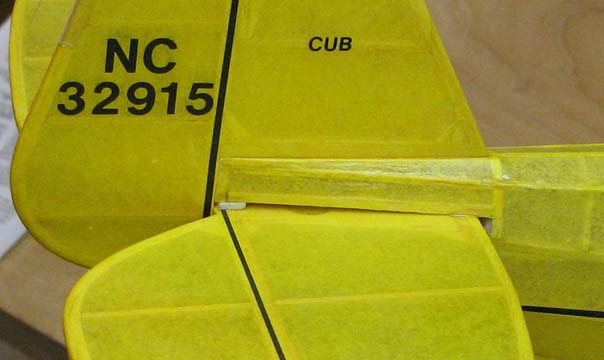
I cut a 1/16" balsa shim and CA'd it in place
under the stabs leading edge as shown below. This has the stab bonded in
its slot with the incidence adjustment that you came up with yesterday.
Last but not least, I discovered the prop shaft
was slightly bent and straightened it. Oh yes, I also reglued the left
wing's root rib that had popped loose to the top of the fuselage using CA.
Now I think the Cub is ready to fly once again. Thank you again Mike for all
of your help trimming my first FAC J-3 Cub Model
Later on Mike put me in contact with Richard Adam
here locally who is an outstanding FAC builder and flier. He has designed
and produces one of the neatest 10:1 rubber motor winders shown below. I was
able to purchased one from Richard. What a work of art! The winder's case
appears to be made out of some kind of Teflon. I am not sure what
the internal gears are, but they turn so smoothly and quietly providing ten
turns to the rubber motor for every one revolution on the
crank.......................Tandy
