Comet "Phantom Fury" Construction Project Session #1
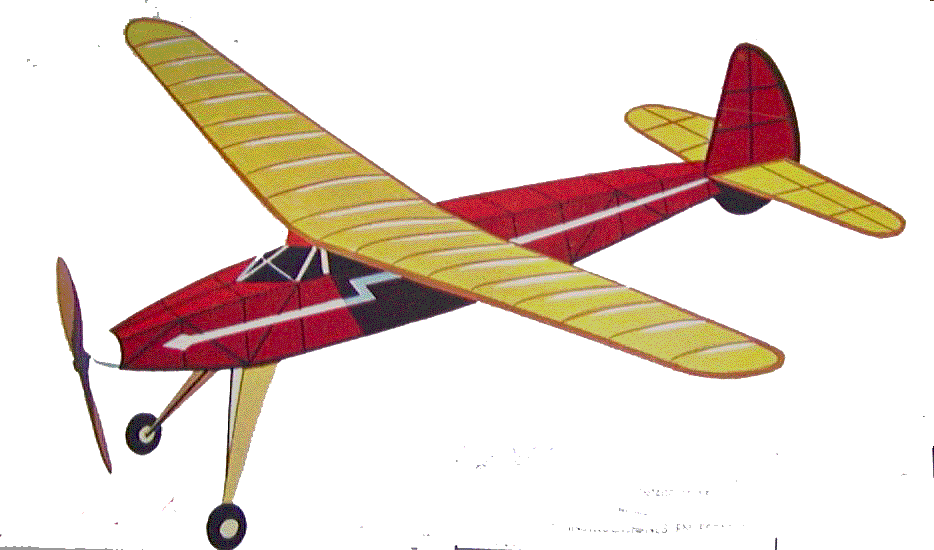
Comet "Phantom
Fury" Rubber Powered
Free Flight Model Airplane
By Tommy Gray
AMA 17063
The "Society of Antique Modelers" championships for 2009 will include a special
"Mass Launch" event for the Comet Phantom Fury model. This will be a special
event for this year's Champs. Not having been much of a Free-Flighter, I decided
to build one for the fun of it, and what you will see here is the build sequence
of what I am calling the "Phantom Fury Adventure". I am not going to show tons
of detail but rather the "Essence" of it with pictures and explanations of what
I did as we go along. I hope this interests some of you and maybe will allow you
to vicariously live through the build in case you ever want to try one.
First, I started off managing to find a
for real, "Genuine" original Comet Phantom Fury model kit on Ebay. I was
unpleasantly surprised, however, when upon opening the box I was greeted with
the thing I hated most when I was a kid and that is "Printwood".
Printwood was simply a sheet of balsa with the outlines of the parts printed on
them. You, had to do all the dirty work, to cut the parts out, and about half
the time I broke about as many as I was able to cut out!
.JPG)
I also did not like the way the
fuselage was in two parts, coming apart just in front of the peg for the rubber
motor. Then there were the 1/16 square sticks for the fuselage structure. I knew
I would never attempt to build it without it being so flimsy that it would crush
when I picked it up, so back to the drawing board.
A phone call to SAM President Jim O'Reilly, disclosed that he had a much better
plan, and that Bob Holman had a nice laser cut kit for the bird. I was getting
excited all over again, so I put in the order. A couple of weeks later, I
received the plans but no kit??? I put in a second call and in a couple of days,
the kit arrived and it was great. Not having used a laser cut kit before (I
scratch build everything usually, and cut my own parts), I was pleasantly
surprised when the parts literally fell out of the sheet. My son looked at the
kit and picked up a sheet while saying, "Do they come out easy?" when parts
starting falling out in his hand!! 'Nuff Said!
Well, I finally finished up another project I had on the board, and cleared
everything up in preparation for the start of the build.
==============================
Here We Go!!
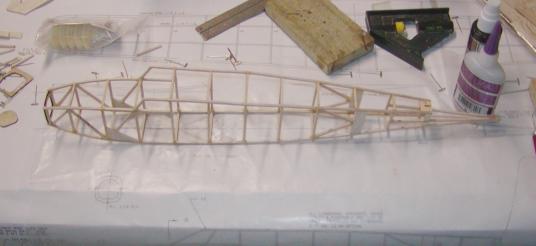
First I laid out the plans on the board (a piece of very straight 3/4" birch cabinet grade plywood covered with a 2' X4' sheet of Celotex (tm) ceiling tile turned upside down and covered with plastic). I then covered the plans with waxed paper and got started by laying out the fuselage sides. The plans stated that 3/32" square was an option for the longerons and uprights, so that is what I used, as I figured that I might be able to handle them without crushing them as opposed to the tiny 1/16' sticks!!

Though it is a little hard to see (my camera batteries were getting low!), I built one side, then covered it with waxed paper and built the
second one on top of
it so that I ended up with two identical fuselage sides to start.
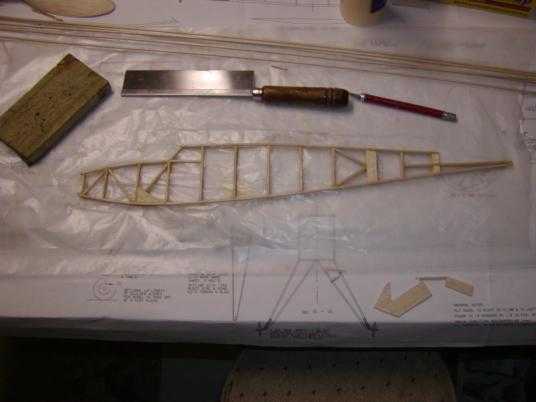
Next, I took a few minutes to lightly sand the sides smooth and to get rid of any stray glue droplets in preparation for putting the sides together.
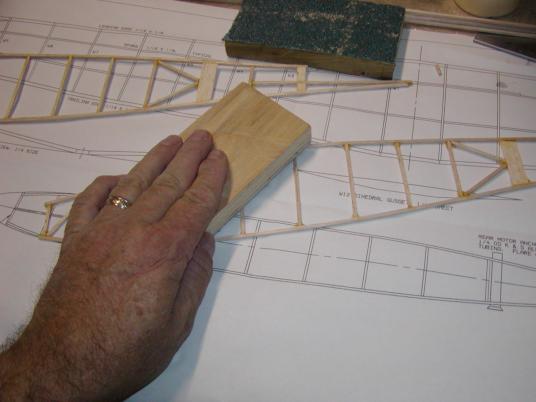
I then cut all the cross pieces to length using the plans as a guide and using "T" pins, I pinned the sides vertically over the fuselage top view (I don't have a jig small enough to handle such a little plane!!) exercising care not to pin through the longerons. I used pins on both sides of the fuselage sides to keep the sides shaped according to the plan, crossing a pin or two here and there to hold everything down snugly. I then began adding the cross pieces until I had the middle done top and bottom, using a square to make sure everything was kept square as I went along. I then loosened the pins and pinned the tail end down snugly and glued it together top and bottom.
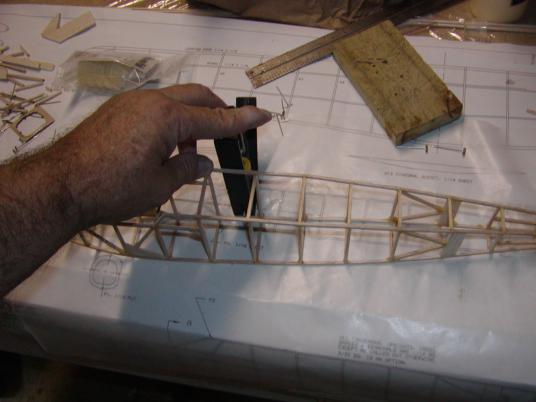
Next, I did the same thing on the front, and once it was glued, I removed it
from the plans, and put in the nice laser cut front plywood former, after I used
my Dremel tool and a cut-off wheel to slightly open up the stringer slots to fit
the larger (3/32) sticks. I then put on the top, bottom, and side short
stringers, the top windshield former, and the center windshield stringer stick,
and we're about done.
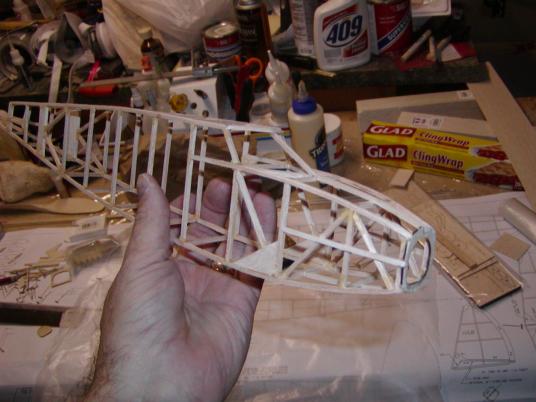
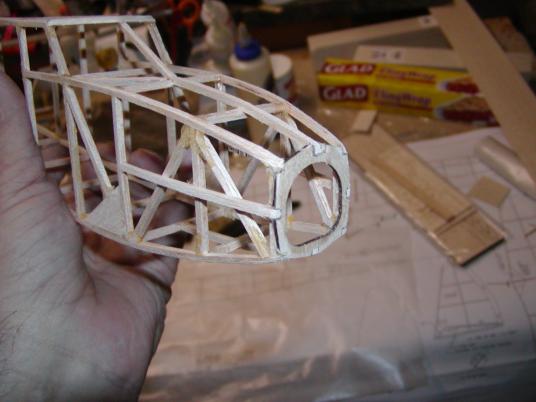
Here is a shot of the mostly finished fuselage showing it roughed out and ready for finishing.
More to come...........Tommy