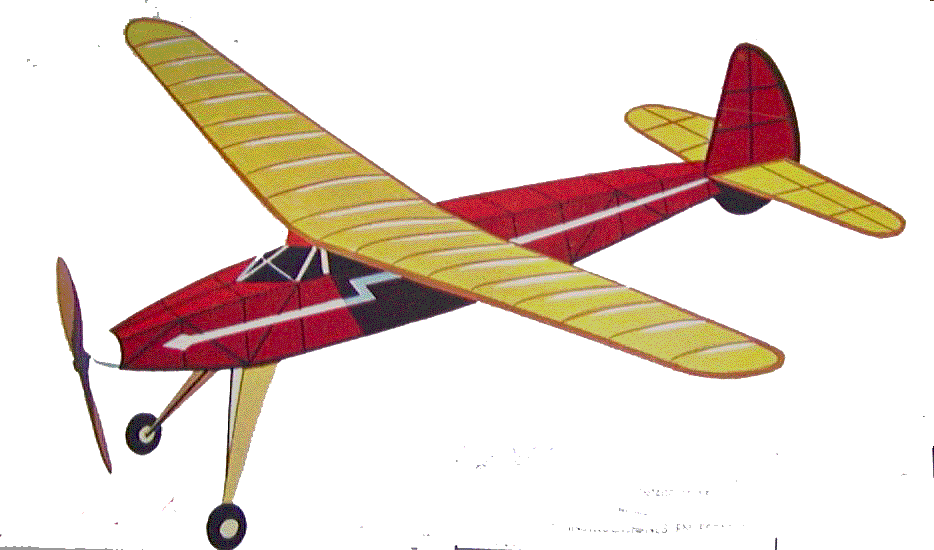
Comet "Phantom Fury" Construction Project Session #8
Comet "Phantom
Fury" Rubber Powered
Free Flight Model Airplane
By Tommy Gray
AMA 17063
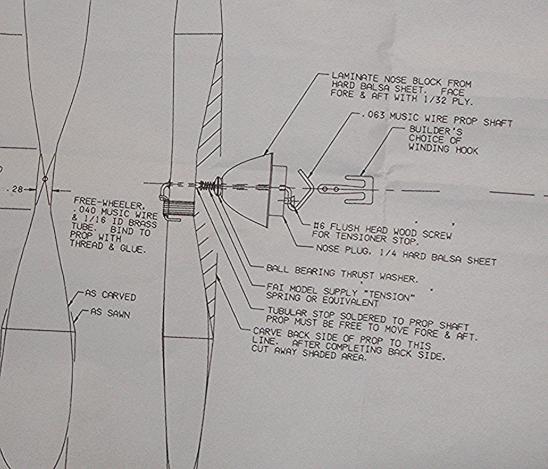
This will be a very short session because it only addresses the nose block. According to the plans, the nose block is to be made from layers of "1/4" balsa.
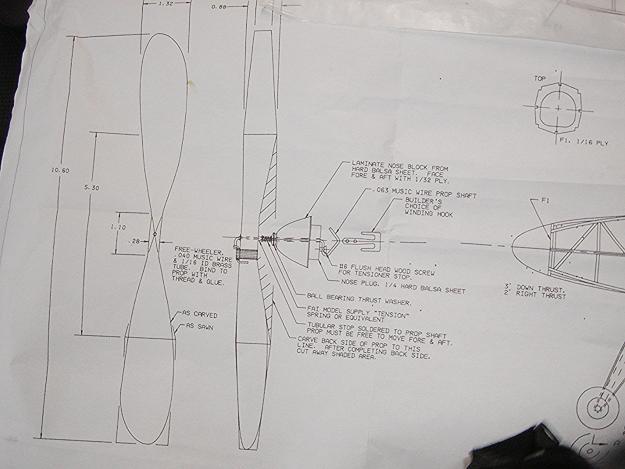
Here is a closer look at the plans....
I started by cutting some pieces of 1/4" scrap and thin ply and stacking them. I glued them together with aliphatic resin glue.
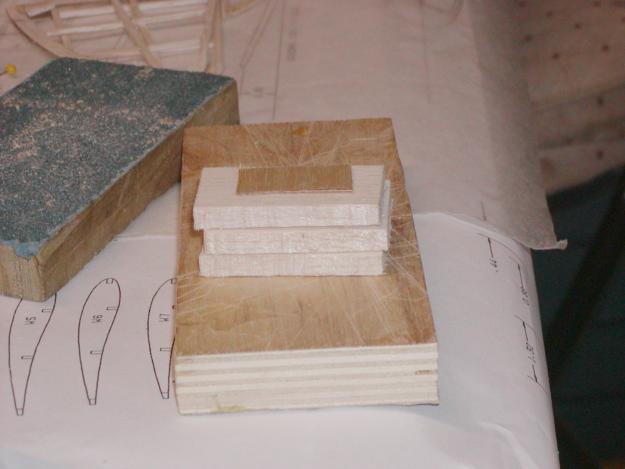
As you can see, I also added the top and bottom layers of thin aircraft plywood per the plans.
Next, I carved away "anything that did not look like a nose block" and after a little sanding, here is what I came up with.
.JPG)
As you can see in the previous picture, I also added another piece of 1/4" to the back in the shape of the opening in the "firewall" former to allow the block to fit into the hole and stay put.
FYI: When I was punching out the parts in the laser cut sheets, I saved the small piece of plywood that was in the hole in the former, so that I could use it on the back of the nose block as you can see below. It is what you see labeled "TOP" in the next picture.
.JPG)
You can also see in the picture above, that I have the preliminary hole for the prop rod drilled through the nose block at this point. I used my drill press to drill the hole in order to assure that it was exactly perpendicular to the back of the block. I will later come back and drill through with a larger bit for the brass tubing bushings for both the nose block and the prop..
Well that is about it for the nose block. In the next session you will see my prop carving project.
More to come....Tommy!