Comet Sailplane
Project
A major milestone on the Sailplane project was
reached today. The black trim was painted on the fuselage. As you may recall
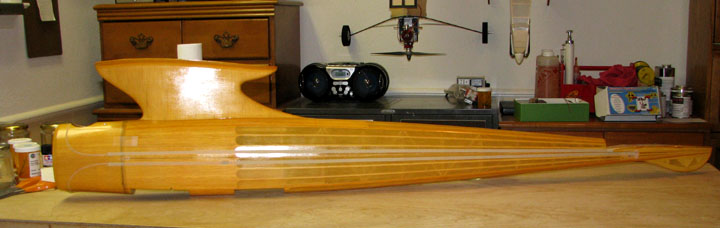
in the last Report No. 146, the picture below of the fuselage with the
complete trim pattern masked off using 1/8" and 1/4" Pactra masking tape was
shown.
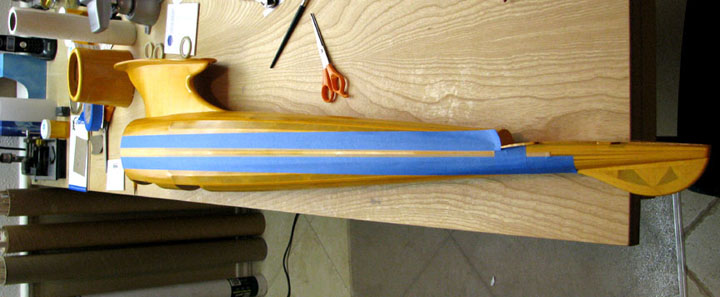
To provide a wider mask for painting, Scott's 3M
low tack blue masking tape 1" wide was used as a backup over and outside the
1/4" Pactra tape as shown below. One coat of 40% clear nitrate dope mixed
with 60% thinner was first brushed over the mask to seal the edges of the
Pactra tape and prevent bleed through.
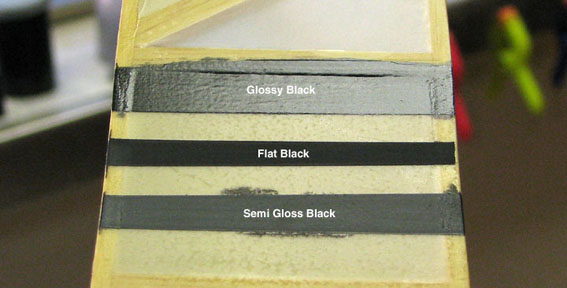
Three jars of Tamiya's Acrylic paint were
purchased and consisted of glossy black, semi gloss black, and flat black
finishes. Strips of each paint were painted on a test sample. As you can
clearly see below, the flat black finish is superior and it just appears to
be "blacker" than the other two. Therefore, flat black was selected as the
finish of choice. Remember, the entire Sailplane will be sprayed one final
coat of clear satin Klass Kote at the end giving it an overall matte
finish.
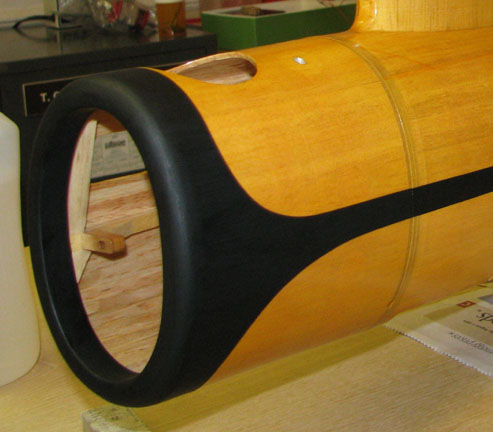
Flat black Tamiya Acrylic paint was carefully
brushed onto the fuselage's mask as shown below. The simple straight
fuselage stripes were done first to get a little experience at brushing
Acrylic. Then the more complex cowl pattern was pained last. Two coats of
the Acrylic paint were used.

The paint was allowed to dry about 45 minutes
between the two coats before the masking tape was removed. The 1" Scott's
3M blue tape was removed first to get it out of the way. Then the 1/4" and
1/8" Pactra tape was removed slowly and carefully, pulling it up over
itself at a 45 degree angle. The edge line of the Acrylic paint turned out
very sharp and crisp as shown in the close up below. This Pactra masking
tape is nothing less than amazing as you can see below.
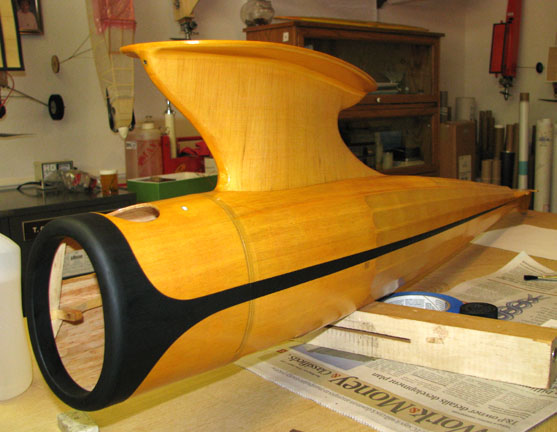
This is an aft looking view of the left side of
the fuselage.
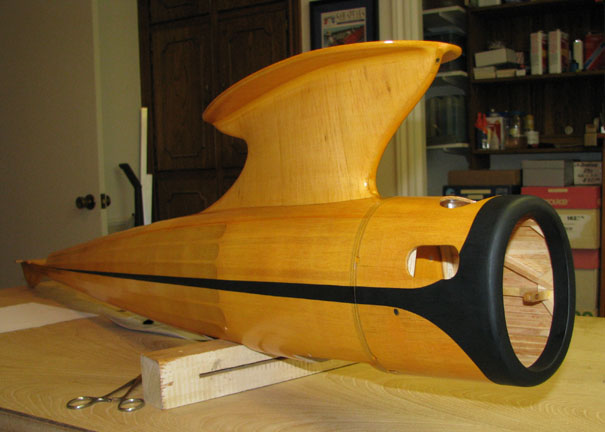
This is an aft looking view of the right side of
the fuselage. Unfortunately, the exhaust cut out in the cowl extends into
the black trim slightly, but it couldn't be avoided.
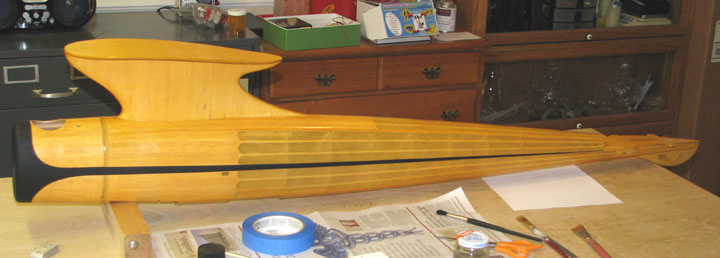
This is a left side view of the fuselage.
This is my favorite forward looking view of the
Sailplane's complete fuselage.
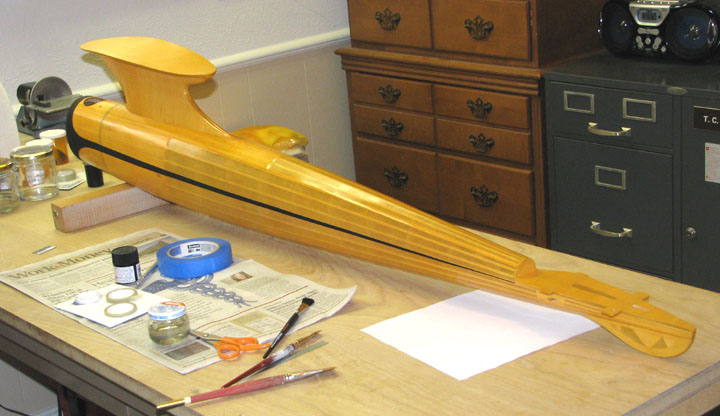
I am most satisfied with today's trim painting
results. Tomorrow I will continue by starting to mask off the four stripes
on the wing and two stripes on the stab..........................Tandy