Comet
Sailplane Project
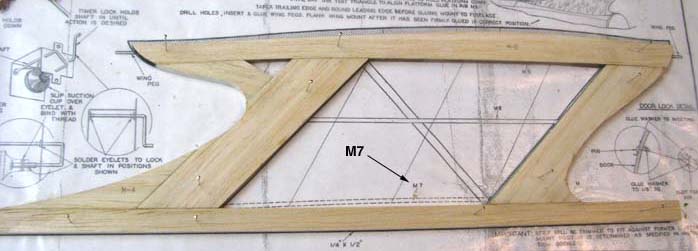
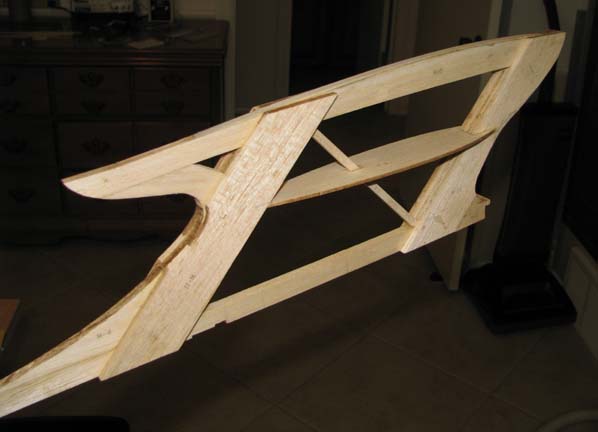
The Sailplane's pylon core is framed up out of
3/16" sheet balsa pieces as shown below.
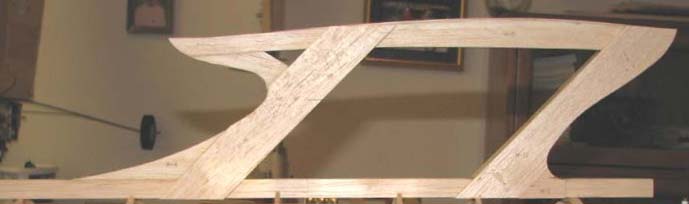
The fore and aft vertical members of the
pylon core are overlaid on both sides with 3/16" doublers as shown below.
1/8" piano wire was used for the wing dowels as
shown below. They were made removable by embedding pieces of 1/8" ID brass
tubing into the ends of the pylon balsa core with epoxy.
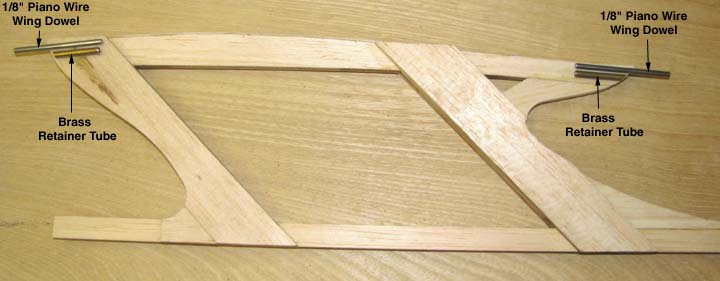
This is a picture of the front brass tube epoxied
into the pylon balsa core.
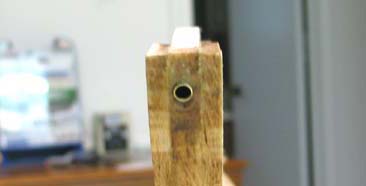
The 1/8" piano wire wing dowel is inserted into
the brass tube as shown below.

This shows the center pylon rib and 3/16" square
diagonal installed.
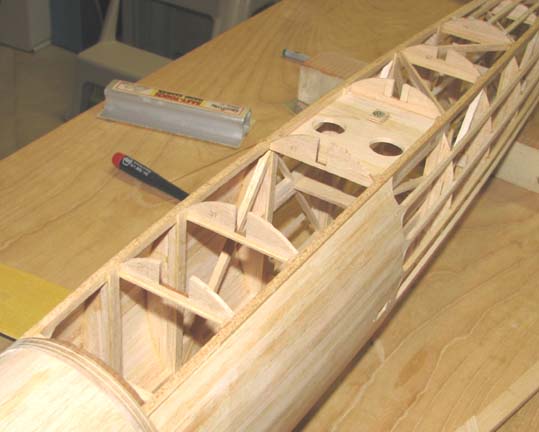
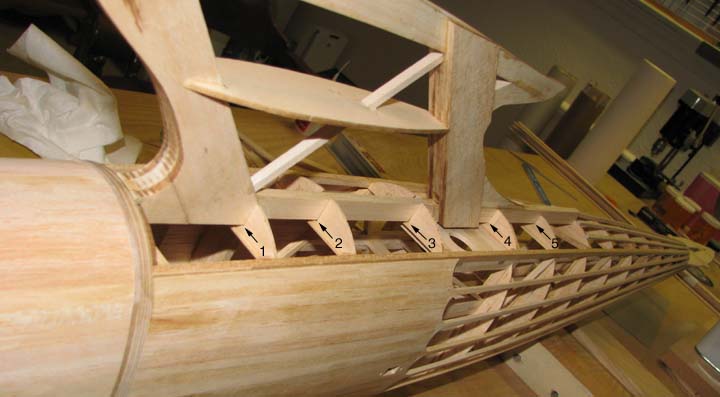
This picture shows the notches in the fuselage's
five top bulkheads for the pylon frame.
The lower pylon member was cut to length and the
frame inserted into the fuselage bulkhead notches as shown below, but not
glued in yet.
In the picture below, the pylon's lower frame
member fits down onto the bottom of each of the five notches, insuring the
proper incidence alignment. This a testimony to the accuracy of the laser
cut parts.
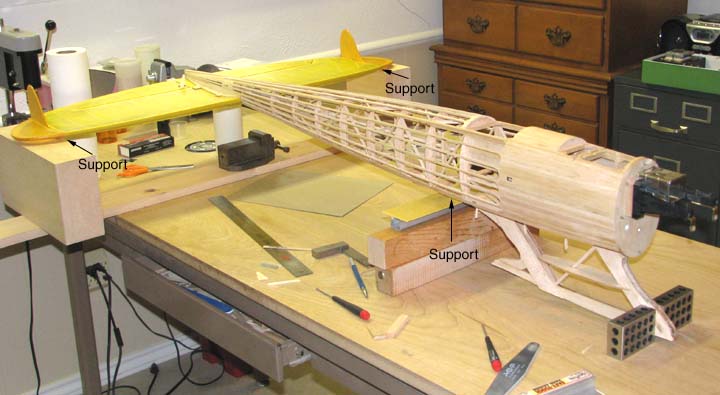
In order to align the pylon frame vertically, the
stab was attached to the fuselage, which was inverted on the work table and
supported in three places. The pylon frame dose not contact the work table
as shown below. The stab was supported parallel to the top of the work table
and two steel squares were used to check the perpenduclarity of the
forward pylon frame pylon frame to the surface of the work table.
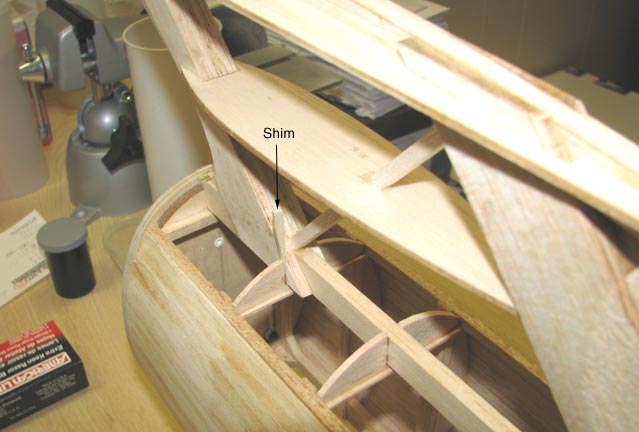
Only slight shimming was required to align the
pylon vertically as shown below.
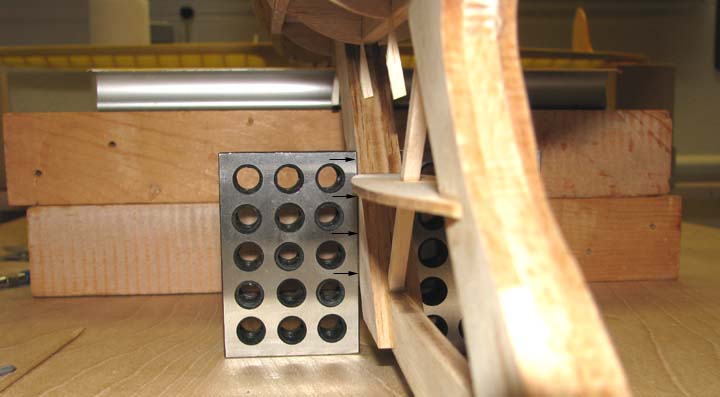
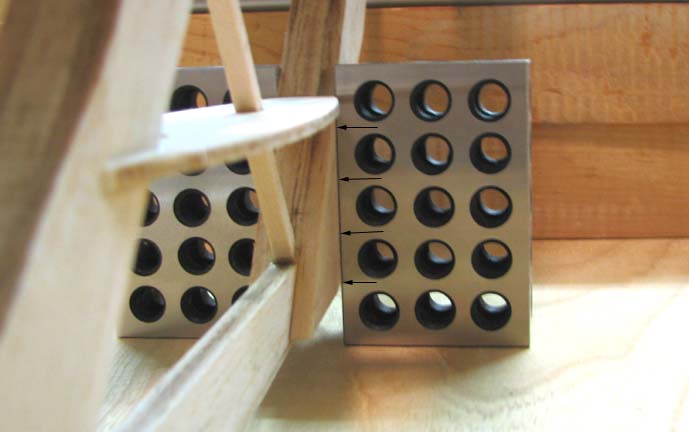
A second perpenduclarity check was made with the
steel squares on the rear pylon frame to the surface of the work table. In
the picture below, notice the rear pylon frame contact all along the steel
square's vertical surface as the arrows show.
In the picture, the other side of the rear pylon
frame also contacts all along the steel square's vertical surface as the
arrows show.
The picture below shows the pylon frame tacked
glued in place on the fuselage structure. Notice that the top rib has been
installed on the pylon frame. The bottom pylon rib will not be installed
until the fuselage planking around the pylon frame is completed.
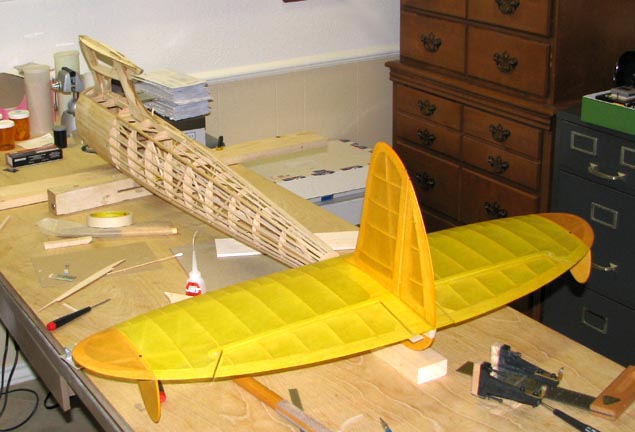
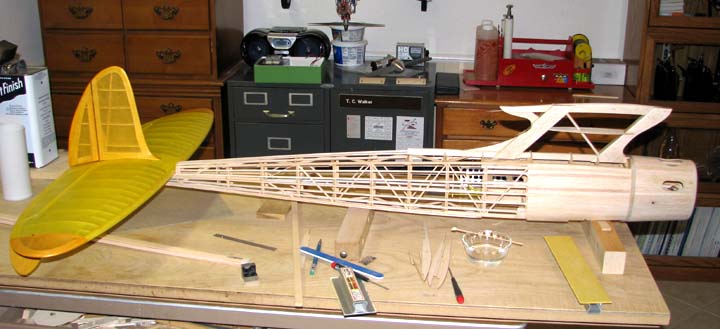
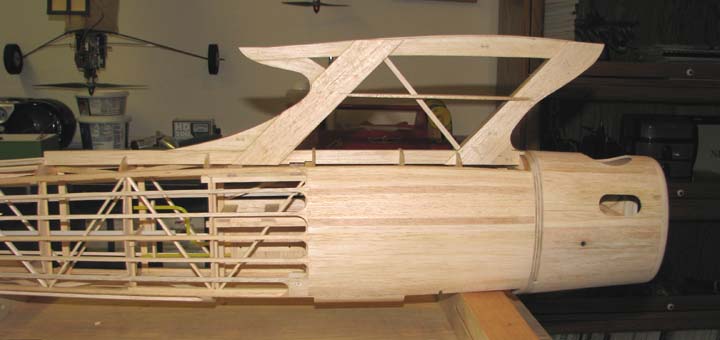
I will close with this picture of the fuselage
with the tail, pylon, and cowl in place.........................Tandy