Comet
Sailplane Project
Before starting this report, I need back up and
cover some details that was omitted in the previous Report No. 90. In the
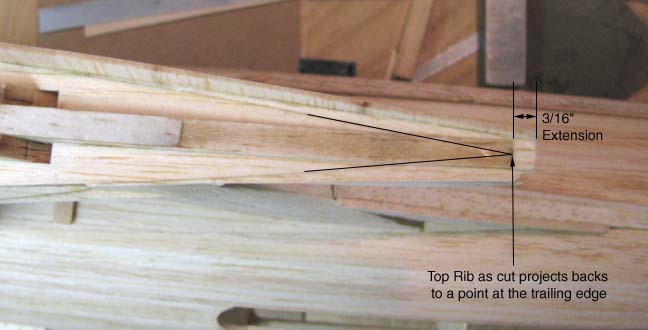
picture below you can see that if the edge of the top rib is projected aft
it comes to a point at the trailing edge. This is unsatisfactory because of
the 1/8" ID brass tube that is embedded in the pylon frame to receive the
wing dowel. The other problem is that the wing root chord length is exactly
13-3/4" as is the length of the wing saddle. However, the pylon frame was
too short so it was extended by 3/16" as shown below.
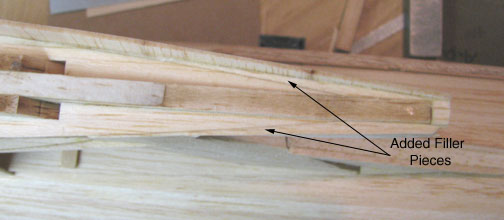
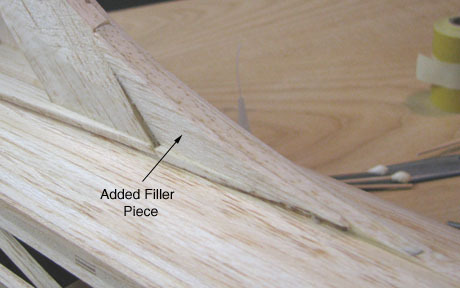
In order to accommodate these changes, 3/32"
filler pieces were added to the top rib as shown below.
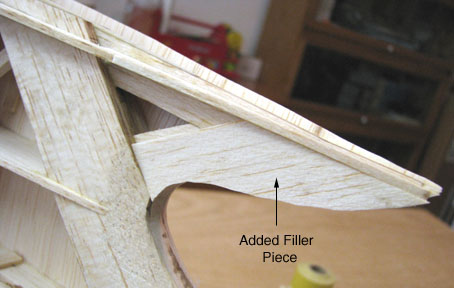
3/32" filler pieces were added to the top of the
pylon frame as shown below. This was necessary to provide an extended gluing
surface when the filler was trimmed down.
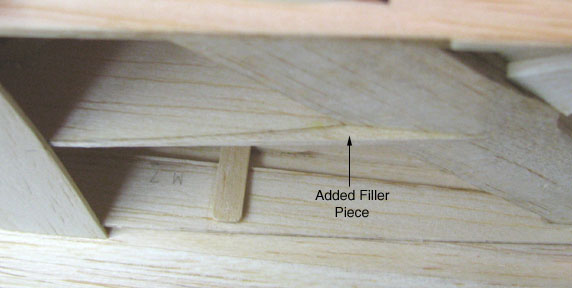
3/32" filler pieces were added to the center rib
as shown below.
3/32" filler pieces were added to the bottom of
the pylon frame as shown below.
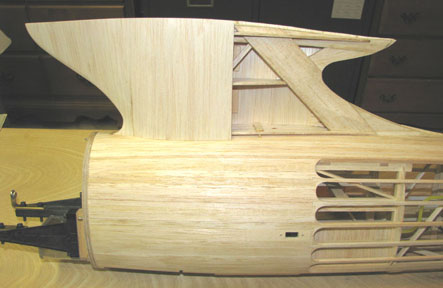
I did not have access to the pylon's interior
frame work for gluing since the frame was already planked on the other side
as shown below. So any adhesive I use has to be applied before the final
planking goes on. The problem of course is how to hold the planking in
place up against the center rib long enough to achieve a bond necessary to
produce the hour glass shape.
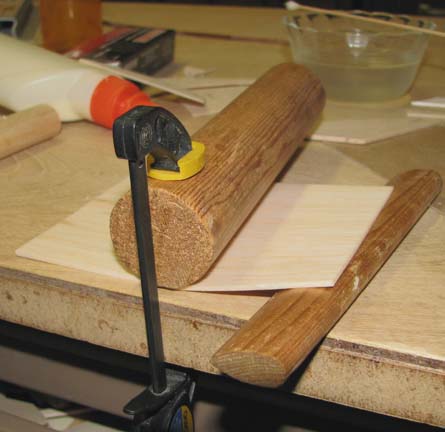
After some discussion with Eut Tileston, he with
the idea of trying to preform the sheet of 1/16" sheet planking into the
hour glass shape before attempting to glue it onto the pylon frame. That way
not so much gluing pressure will be required. I cut the 1/16" sheet planking
to size and sanded the bottom edge so it would intersect the top of the
fuselage planking with a nice fit and marked the vertical location on the
planking where it needed to be formed. Water was used to wet the planking on
both sides. One edge of the planking was shimmed up and a short length of
old curtain rod dowel (1.3" Diameter) was clamped on top as shown below.
Notice that more forming is done on the foreground edge nearest the clamp to
achieve the hour glass shape. This was then allowed to dry overnight so the
planking would take a permanent set.
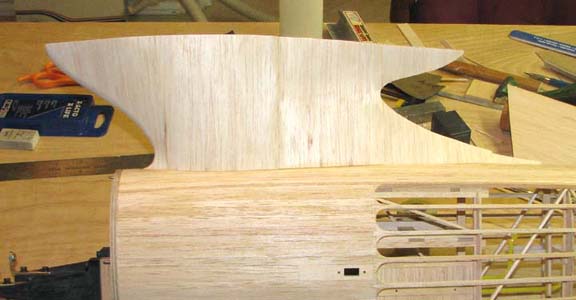
The attempt to preform the sheet of 1/16" sheet
planking into the hour glass shape did in fact work as shown below.

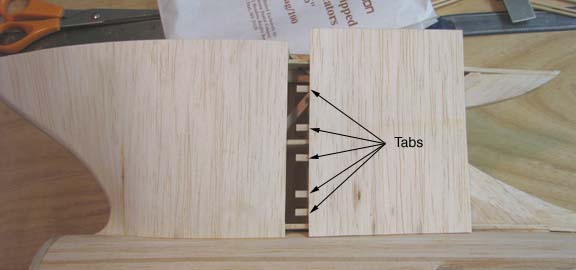
Five alignment tongues (or tabs) were added to
the inside front edge of the 1/16" preformed planking piece to ensure both
edges of the joint would be aligned as shown below.
Elmer's Carpenter aliphatic glue was applied to
the top and bottom ribs, along the trailing edge of the pylon frame, and to
the leading and bottom edges of the preformed piece of planking. Medium CA
was liberally applied to the center rib. The tabs of the preformed planking
was inserted under the front planking and the preformed planking was pushed
into place. Finger pressure was quickly applied to the preformed planking
along where the center rib was underneath and then held tightly until my
hand begin to cramp and I had to release the finger pressure. Apparently it
was long enough because the preformed planking held in place! I pried up the
rear edge of the preformed planking, medium CA was applied, and the rear
edge of the preformed planking was again squeezed down until the CA had time
to bond. Finally pieces of 1/16" sheet planking were added top rear and
bottom rear of the pylon frame to complete the left side planking surface.
The finished planking on the left side is shown below.
This will be allowed to dry thoroughly before any trimming or sanding is done to the planking. My next task is to trim and sand to contour the top edges of the pylon planking and install the wing saddle, but will have to wait until tomorrow. I truly hope this particular approach to blind planking will be helpful to some of you...........................Tandy