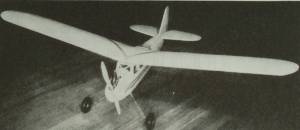
"Project Re-Buc"

By Tommy Gray
AMA 17063
Well the project is in overdrive with the nice weather we have had this week, so after catching up with my SAM duties, I got on the old "Buc" with a vengeance. I wanted to get the fuselage planking done so I could start the finish work. I have a wood order in for the next project and have set myself a deadline of March 1 to start on it so that leaves me only two weeks to finish up the S.B. I will probably never make the deadline but am going to try anyway.
I started the planking chore by adding a little strength to the underside of the fuselage. In the past, I had 1/16" sheet covering the fuselage and it was just too this and I crushed it a few times cracking the wood when picking up the plane. I decided that this time that is not going to happen.
I added a stringer of medium hard 3/16" balsa on the bottom of the fuselage running from front to back of the sheeted area. This should give the bottom a little extra support without adding a lot of weight.
Next, before starting the planking, I added the nose weight to the small cavity I created in the nose block. As I started, I noticed however that the hole seemed a little shallow, and since there was plenty of wood left in the bottom, I got out the Dremel tool and hogged out a little more wood to allow for more lead.
After finishing up the cavity, I got out the lead. By the way, I had a real time finding lead shot in our area. I finally, after checking with every sporting goods store in about a 100 mile radius, went to a local rifle range. The nice fellow there said he did not have any shot for sale. After asking me how much I needed, I told him and he said asked what I needed it for. When I told him it was for a large model airplane, he got interested. He said "Does it have to be new?". I said not at all. So he told me that he had just what I needed. He went back to a large bucket of reclaimed lead shot and got me a large bag full of it. It was a lot more than I needed, so I will have some left for other projects. I really appreciate his willingness to help, as apparently lead shot is getting as hard to get as some of our model materials!
I took the shot and mixed up a "Paste of lead shot and fast drying epoxy glue and filled the void in the nose block cavity with it.
Here is what it looked like drying.
Once the glue set up and everything was secure, I started the planking.
A longer view of the bottom with the first piece in place.
I used some 3/32" firm balsa for the pieces. I used my trusty Dan McLeod balsa stripper to cut strips 1/2" wide to use for the planking. I started in the center of the bottom with the first piece. I glued it in with some aliphatic resin glue. Once it was dry, I removed the clamps and started adding mode pieces one at a time until I had the bulk of the bottom done.
Next I added some side sheeting starting at the window area where I had cut out the original 1/16" sheeting that was old and brittle.
The large piece took up a lot of the remaining space in one piece. I repeated this on the other side. Once the sides were done, I started closing up the nose. The remaining hole was somewhat irregular, so I used some soft 1/8" sheet, cut to fit to fill the hole. It is thick enough that when in place, I can sand it to the needed curved shape. I may have to add a little filler here and there but it filled most of the area nicely.
Things are starting to look a lot better with the planking in place. Here is a look at the nose after planking but before sanding was completed. There will be a lot of sanding required to get the curvature consistent, but that is what you get into on these things.
From another angle....
And still another......
Well that is all I have time for now, as the wife is coming hope from visiting a friend, and wants to go out for lunch, and since I am a little hungry myself, I will stop for now.
More to come.....Tommy!
Click Here to go to the next page ( )....