Speed 400
Cloudster Project
In preparation for producing the Cloudster wing
ribs, the next step was to first cut out the 1/32" plywood R1 rib template
shown below.
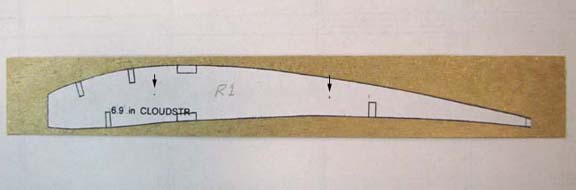
This included drilling the two alignment holes
and carefully cutting out all of the spar notches and checking their fit
with the actual spars selected as shown below.
As part of the Cloudster's on going weight saving
effort, the sizes of the spars were reduced as follow:
Main Spars
3/32" X 1/4"
Rear
Spar 3/32" X 3/16"
Turbulator
Spars 1/16" X 3/16"
Leading
edge 1/4" X 1/2"
(trimmed down later)
Trailing
Edge 1/8" X 1/2"
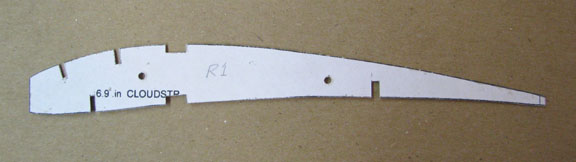
The sharpness of the plywood rib template is
better seen from the back side as shown below.
Two 1/16" alignment dowel pins were cut to
length. The plywood template was placed over a sheet of medium 1/16" balsa
and a No. 44 drill bit was twisted by hand through the template's alignment
holes into the balsa sheet below. The alignment dowel pins were inserted
through the holes pinning the template to the balsa sheet as shown below. It
is to be noted that the forward hole and dowel was done first and then aft
hole and dowel done second.
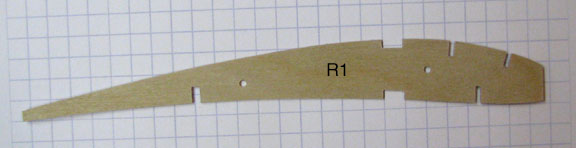
The first balsa rib was then cut out,
notched, and sanded to shape while on the template. Then the near perfect R1
rib was removed and placed below the template for you to see below.

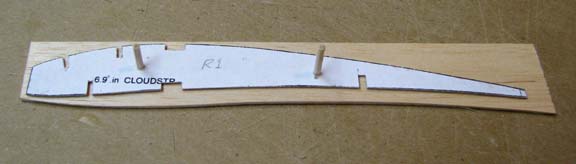
Just to illustrate the accuracy consistency of
this method, the second R1 rib was cut out, notched, and sanded to shape. It
was then placed below the first R1 rib as shown below. I know some model
builders make a complete stack of wing ribs at one time using a band saw.
However, for me, maintaining this kind of accuracy in balsa can only be done
one rib at a time using the template method.

This process will now be repeated over and over
for a day or so until all of the Cloudster ribs have been
made........................Tandy