J-3 Cub Wire
Landing Gear Installation
Yesterday afternoon, glued up the two-piece
bracket for the landing gear wire shown below.
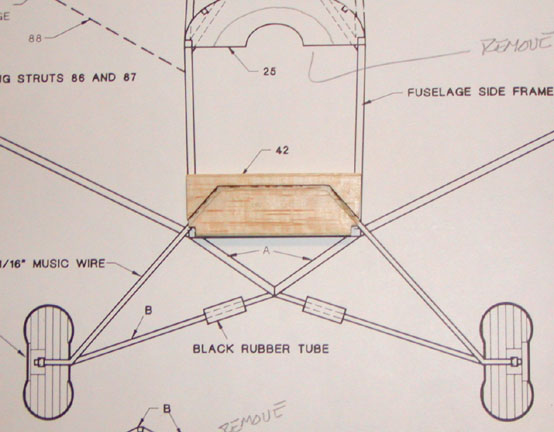
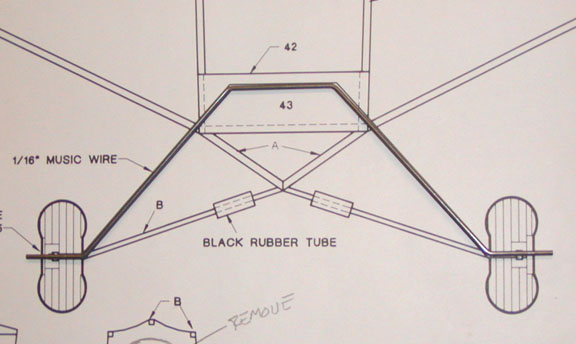
I bent the 1/16" landing gear wire as per the
plan as shown below. Jerry Burk had a great suggestion for getting nice
sharp bends in the wire, which I used successfully. I slip a piece of 1/16"
I.D. brass tube onto the 1/16" piano wire up the bend point. Then I slipped
the next size brass tube over the first one for stiffness. Grasping the wire
at the bend point with a large pair of pliers, I bent the wire by pulling on
the brass tubes. As you can see below, this technique produces a minimum
radius bend in the 1/16" piano wire every time. I left the axles a little
long until I see how the wheels are going to work out.
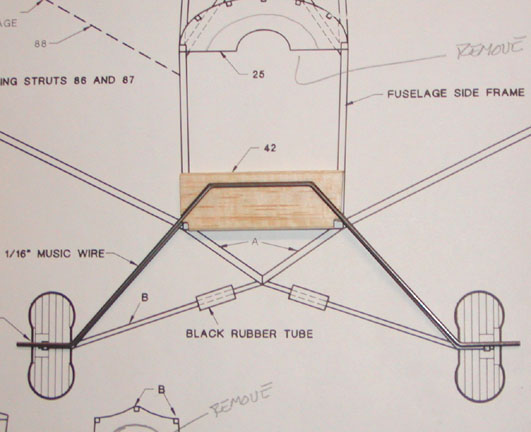
The landing gear wire was then epoxied down into
the groove of the balsa bracket as shown below.
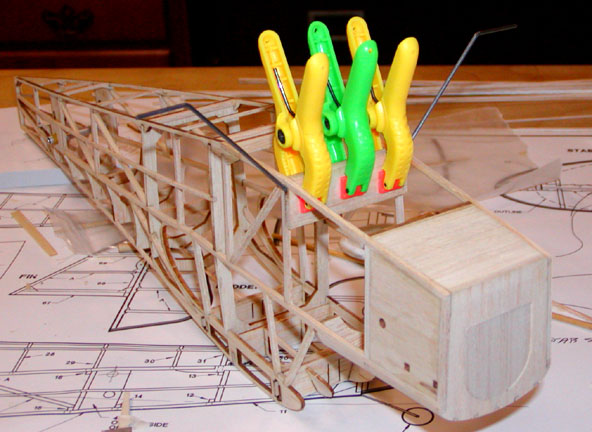
After the epoxy had dried and just before bed
time last night, I glued the landing gear bracket/wire assembly into the
fuselage structure with Titebond as shown below. I used three of the little
plastic clamps that Bob Beecroft had sent me some time ago.
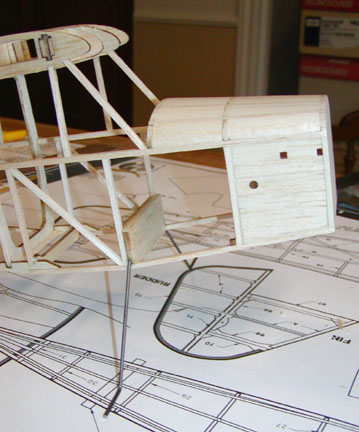
This morning I got up early in order to vacuum
out and wash my wife's new PT Cruiser for her. What a great little car the
Cruiser is. Anyway, once I finished with that chore, I took the three clamps
off of the landing gear bracket/wire assembly and sat the fuselage up on its
wire gear as shown below.
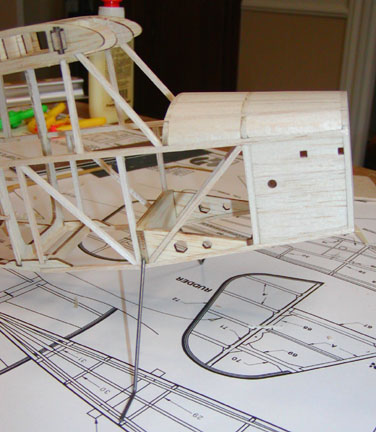
The final steps in the wire landing gear
installation were to add the 3/32" balsa diagonal in the forward fuselage
bay and glue in the two support gussets as shown below.
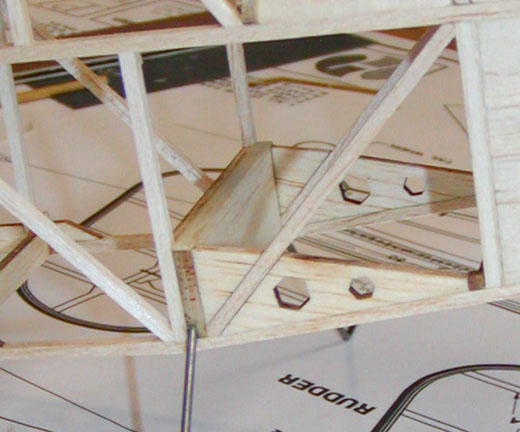
Here is a close up of the final installation.
In the feed back I have received, the general
consensus has been that the 5 degrees down thrust and 3 degrees right thrust
shown on the plan are both too much. Mike Midkiff suggested that I use a
reduced 4 degrees down thrust and 2 degrees right thrust, which is what I
plan to do. This afternoon, I am going to set up and drill the hole in nose
block.............................Tandy