J-3 Cub Drilling
and Shaping the Nose Block
This morning I had to take my Honda Odyssey to
Fort Worth to get the front end alignment checked. Even though I only have
8000 miles on the new van, it was drifting to the right on the free way. As
it turned out the caster had to be adjusted + 1 degree on the right front
suspension and it tracks the road just fine.
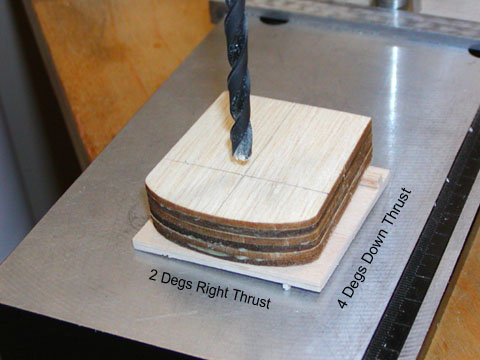
This afternoon, I made up the nose block jig
for the drill press using Jim O'Reilly's suggested calculation approach. For
the 2 degree right thrust, I used a 1/16" shim. To determine the location of
the 1/16" shim on the drill plate, I made the following calculation: X =
(1/16)/Sin (2) = 1.79", which is shown in the picture below. Likewise for 4
degrees down thrust, I placed an 1/8" shim 1.79" on the drill plate also
shown in the picture below. The nose block jig was placed on the bed of the
Micro Mark drill press and the laminated nose block was placed on the nose
block jig ready for drilling as shown below.
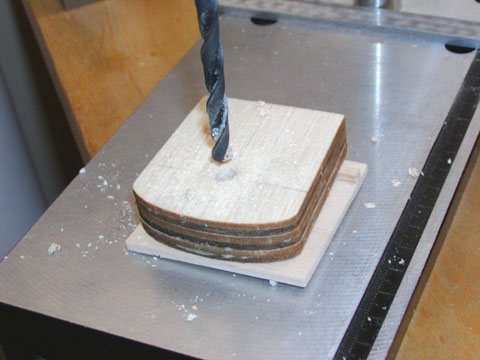
A 1/4" hole was then drilled through the front of
the nose block as shown below. The nose block jig worked out perfectly!
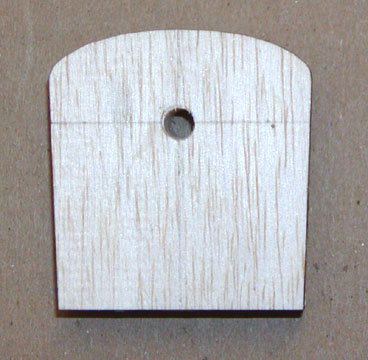
This shows the skewed 1/4" hole drilled in the
nose block.
The key to the front bulkhead was then glued to
back of the drilled nose block as shown below.
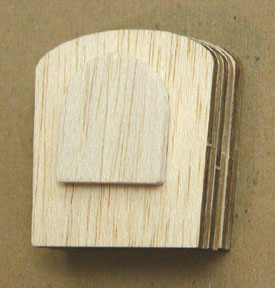
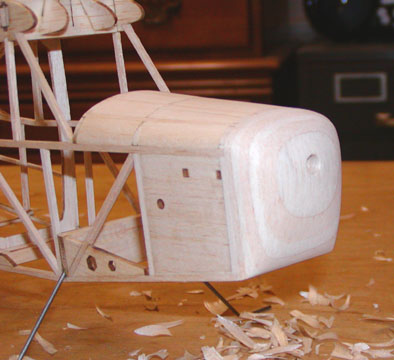
The nose block was held on the front of the
fuselage with the key in place. It was carved to shape and then sanded to
final contour as shown below. I am pleased with how this nose block exercise
turned out and I learned quite a bit.........................Tandy