J-3 Cub Shaping the
Wheels
If you recall, the J-3 Cub has rather fat wheels. Through a series of gluings, I laminated all eight of the wheel parts on both wheels as shown below. I drilled out the axle holes and CA'd a short length of 1/16" I.D. aluminum tubing into the center of each wheel for a bearing.
The wheels are to be shaped as shown on the plan
below. I sent out a message to several experienced
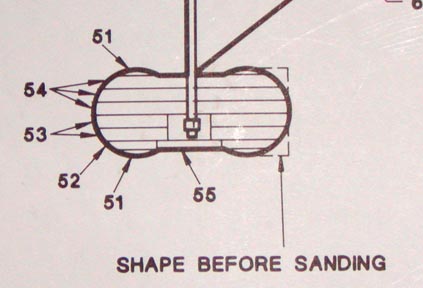
Flying Aces Club modelers on just how I should go
about doing this and got back a number of approaches. I took certain
ideas of each approach I received and came up with one that would work for
me.
I put two 90 degree bends in a piece of 1/16"
wire, inserted one end into the wheel axle tube, and marked the wheel blank
with the other end of the wire. Then a 1/16" hole was drilled completely
through the wheel where the mark was. Finally the wire was inserted into the
hole as shown below. This keeps the wheel blank from turning on the 1/16"
wire.

On the opposite side shown below, is the 1/16"
piano wire I used as the spindle to chuck up in the Micro Mark drill press.
Notice it has a wheel collar pushed down against a short piece of 1/16" I.D.
aluminum tubing.

This picture shows the wheel blank chucked up in
the drill press.
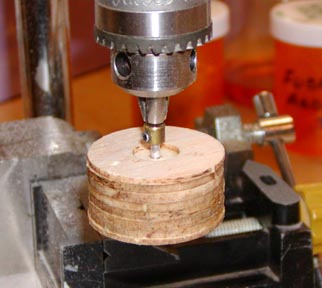
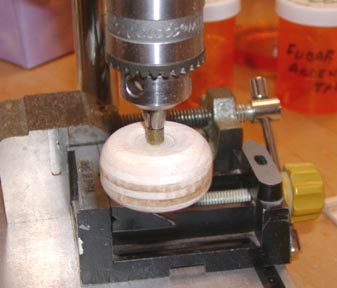
The drill press was turned on and one side of the
wheel was sanded into shape using a sanding board that was made for shaping
ladies acrylic finger nails. Then I used various grits of emery paper to
smooth out the wheels surface. Up next to the spindle, I used tightly
wrapped sand paper around a short piece of 1/16" wire to sand down inside
the center radius. The wheel was turned over and the same procedure was used
on the other side. I actually went from one side to the other several times
until I was satisfied the wheel's symmetry. Maybe for the second wheel, I
will lay the drill press on its back so the drill press axis is horizontal
and chucked up wheel is vertical. Will let you know later.
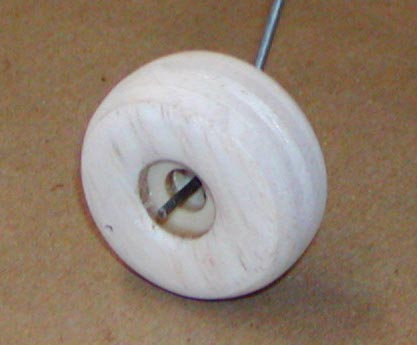
This shows one of the finished wheels. This is
the recessed side of the wheel that gets the hub cap after the wire axle is
cut off and a retainer is installed. Of course the extra hole in the wheel
will be filled.

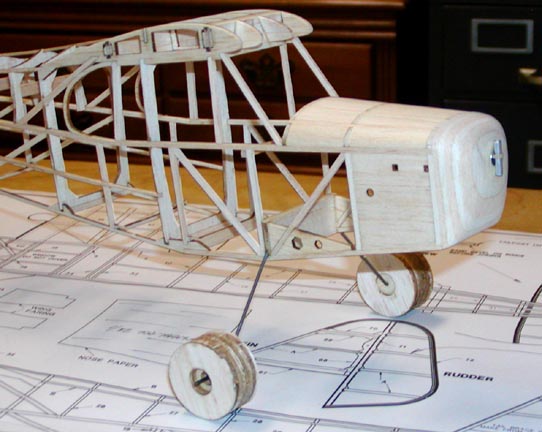
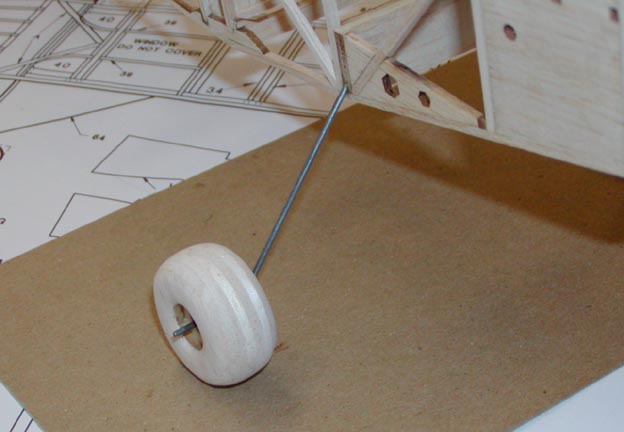
Here is what the wheel looks like on the model's
landing gear.
Here is a close up of the first wheel.
Tandy