56 J-3 Cub Black
Tissue Fuselage Strip
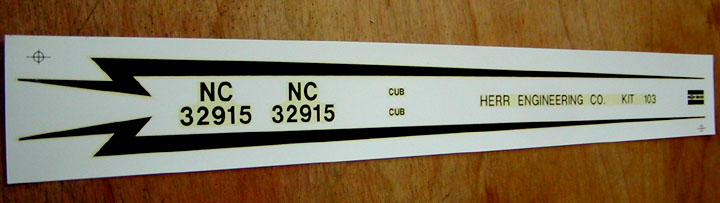
The J-3 Cub Herr kit came with a limited decal set shown below. Since I am trying to develop my FAC (Flying Aces Club) skills, I felt I must try to use black tissue instead of these water slid decals. I scanned these decals and printed the image out on bond paper to use as a pattern for the strip. Next, following Gene Wallock's instructions, I taped down five sheets of newspaper on the work table. I cut two strips of black tissue about an inch wide. I was careful to turn one shiny side of the tissue up and one down and taped their ends on top of the five sheets of newspaper. Then I taped the ends of one of the strip bond patterns on top of the two tissue strips. I cut out the pattern using an 18" metal straight edge and new GEM single edge razor blade.
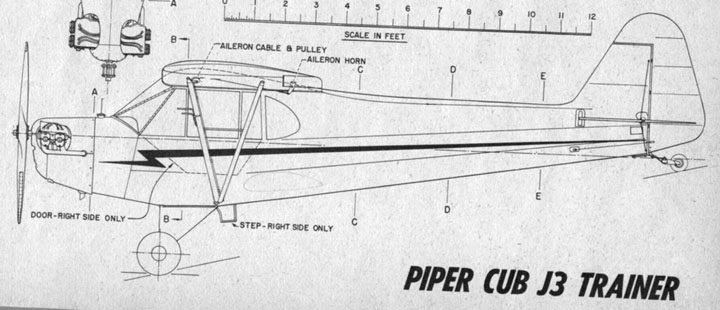
I found a 3-view of a full size J-3 Cub in an old
Air Progress magazine that shows the location of the fuselage strip as shown
below.
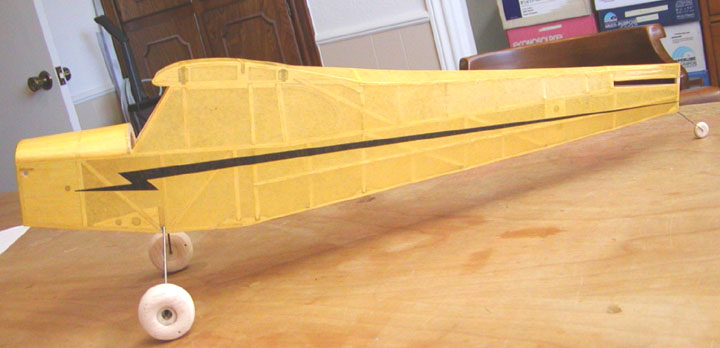
Realizing that the front end on my J-3 Cub model
is not true to scale, I took my best shot at positioning the black tissue
strip to try and match the drawing above. However, I ran into a problem
trying to keep the strip straight down the length of the fuselage. To help
in this regard, I cut a 1" strip of bond paper, which would remain straight,
and taped it on the fuselage along where the top edge of the strip would be.
I positioned the tissue strip up against the straight edge of the bond paper
and slid the tissue strip into position. Using a small brush, I applied
acetone at several points along the tissue strip to stick it down. The strip
gets very narrow at the back and the acetone also wicked under the bond
paper. So I had to quickly remove the bond paper to keep it from sticking to
the fuselage yellow tissue. Good Lord, I was a wreck by the time I got all
of this done. I finished sticking the tissue strip down with acetone and
brushed on a thin coat of clear dope. The tissue strip puckered up in a
couple of places, but I hit these with a heat gun and the puckers came out
for the most part. I took a picture of the final result, which shown below.
I will do the other side tomorrow...........................Tandy