Comet Sailplane
Project
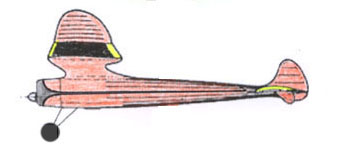
Early on in this project, the trim scheme I
selected for the fuselage was a simple ring around the front of the cowl
transitioning into a tapered stripe down the side of the fuselage.
Conceptually, what I had in mind was something like is shown in the sketch
below, which is straight forward except for the trim up on the cowl.
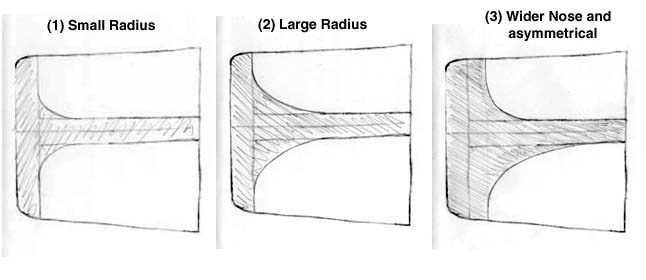
Now that the time has come to put on the trim, I
had to get serious about the design of the trim pattern up on the cowl.
Below are three sketches I considered before finally selecting No. 3. I have
also made the decision to paint the trim on the Sailplane and to use Tamiya
Acrylic.
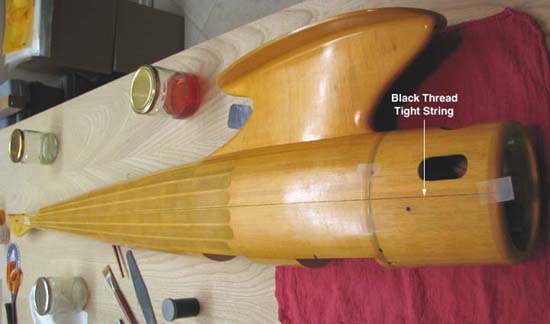
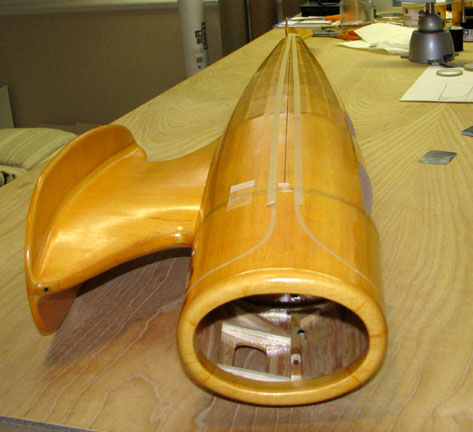
To begin with, the four cowl alignment pins were
inserted in the firewall and the cowl was pressed onto the firewall and
taped in position. In order to lay out and mask off the trim pattern on the
side of the fuselage, a straight reference line was needed. In the picture
below, you can see that a piece of black thread was taped down on top of
the center side stringer at the rear of the fuselage and stretched tight
along the stringer forward where it was taped to the forward edge of the
cowl.
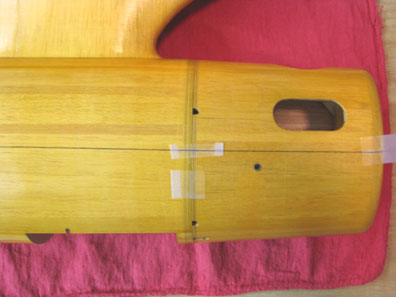
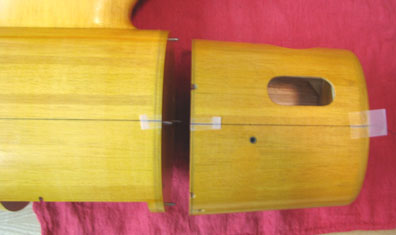
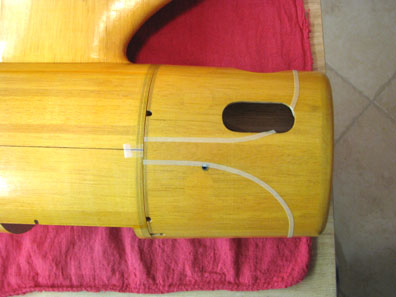
Pieces of tape was put on top of the black thread
and across the fuselage/cowl intersection on either side of the fuselage as
shown below.
The tape and the thread were carefully cut at the
joint and the cowl then removed from the fuselage as shown below. Notice
that the tension of the black thread was preserved on both the cowl and the
fuselage.
Using 1/4" "low tack" red vinyl masking tape, a
ring was taped off around the forward end of the cowl as shown below. In
addition, two pieces of the red masking tape were placed on either side of
the black thread.
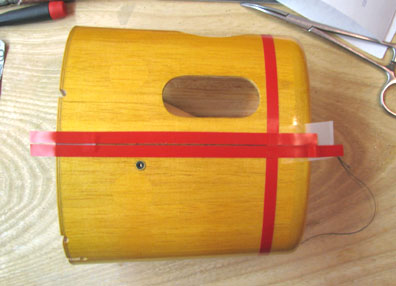
Using 1/8" wide Pactra masking tape, the trim
pattern was laid out free hand on the left starting and ending up along the
outside edges of the red masking tape as shown below. The trim pattern was
laid out in such a way that the width of the trim around the forward end of
the cowl was 1" and that the tapering stripe starts out 1/2" wide as shown
below.

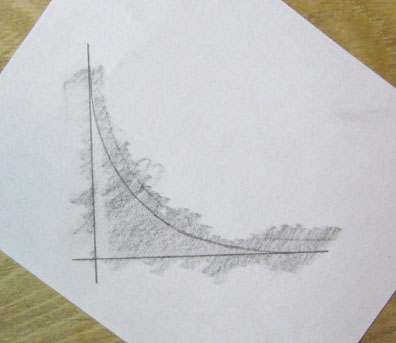
Now the free hand trim pattern had to be
duplicated on the right side of the cowl. So a piece of bond paper was laid
over the taped pattern on the left side and a No. 2 pencil was used to shade
in the pattern curve as shown below.
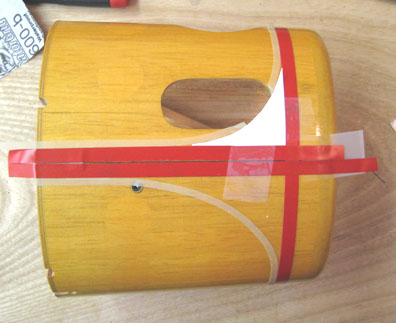
A paper pattern was cut out, taped to the right
side, and the 1/8" Pactra masking tape was laid down along the edge of the
paper pattern as shown below.

Even though the upper portion of the pattern
was further complicated by the cowl's exhaust cut out, this technique worked
out fine as shown below..
The red masking tape and black thread was then
removed, leaving the cowl's trim pattern on the left side masked off for
painting as shown below. Of course additional tape will be added to the
outside of the Pactra tape to prevent getting paint on the outside.

This shows the cowl's trim pattern on the right
side masked off for painting.
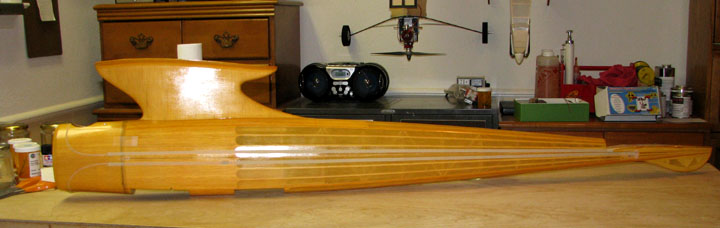
With the cowl taped back onto the front of
the fuselage and using the black thread tight string as a center reference,
1/4" Pactra masking tape was used to mask off the long tapering stripe down
the side of the fuselage. Notice the black thread tight string running in
the center of the strip.
This is a view of the total trim pattern from the
left side of the fuselage.
Tomorrow, additional masking tape will be added
outside the trim pattern. The inside of the mask will be clear doped to seal
the edges. Finally when the clear dope is fully dry, semi gloss black Tamiya Acrylic
will be carefully brushed on to the mask. One thing I am not too clear on is
how long to let the black Acrylic dry before starting to remove the masking
tape. If any of you have experience in this area, please make a
recommendation?........................Tandy